Showing posts with label craft tips. Show all posts

How it’s made Monday—Making Thank You Notes

Monday, September 3, 2012

If you've been following my blog for a while now you’ll know that I take pride in packaging my items before shipment. I love to provide a whimsical experience for my customer; and I’m always trying new ways to make my packaging look super adorable. Not only do I enjoy trying new ways to say thank you to my customers, I also like sharing how I go about doing making them too.

I love to use paper-scrapes from previous crafting projects and I’m going to show everyone how I use my lovely paper-leftovers. Saving your paper scrapes is so crucial because you can sometimes use those scraps for other projects like tags, toppers, and stamp image paper piecing. I have a box filled of different color paper scrapes and I love to go back to that box and search for the color pieces I need before starting from a full sheet of paper.

This time around I’m scraping (pun intended) my ‘Thank you’ card and instead started making the ‘Thank you’ circular tag with a washi tap accent. Really quickly—if you’re unfamiliar with washi tap, it’s a Japanese tape that lots of crafters use for decorating cards, tags, etc. Go ahead and give it a google if you’d like to learn more about them; and, to find the store that I buy my washi tape from you can click here.

So, I’m using ivory leftovers for my ‘thank you’ tags, and as you can see I have lots of them!
I’m also using my ‘thank you’ stamp courtesy of Lawn Fawn. I absolutely love that they provide a free gift stamp with all their orders. It makes receiving their packages even more fun. 
I’m also using one of my favorite Lawn Fawn sets ‘Love ‘n breakfast’ for this thank you tag and I’m using my 2 inch craft punch. 

…and this is how I use the stamps

Next, I simply color in the images and place some washi tape on the back of the tag to seal my bag (but sometimes I skip this process if I’m not using a craft bag), then I apply some more washi tape over the tag to secure it. That’s it! It’s cute, simple, and whimsical. 


Card of the week #2

Thursday, August 2, 2012

Hello! I’m back again with my card of the week. I wanted to try something cute and special so I made this mini-greeting card. Well, it’s more of a mini-love note. I made this card using the adorable Lawn Fawn stamps, Kraft paper, and one of my favorite paper stacks! About a year or two ago I found a How-Tuesday video on the Etsy blog, on how to make a cute mini-book, and that’s where I learned how to make this particular flip book—only I decorated it myself instead printing out their template. To learn how to make the mini-book, click here to watch their super cute video.
I had a lot of fun making this mini-card. I always like making really small cards because I think they look so cute. The Lawn Fawn stamps work really well when making tiny cards, as you can see from the images.  


…and, here is the card completely open. This card was made using a standard size card stock: 8” x 11.5”.

Thanks for stopping by! I hope you enjoyed this mini-love note greeting card. 

Cute Gift Card Holder Idea for Cricut Users and Paper Crafters

Sunday, February 19, 2012

Hello! I’m excited to be showing everyone how I go about making my gift card holders. I’ve been working on a lot of birthday cards, toppers, and many other things. So, I thought I’d share this cute idea with all my Cricut/paper-crafting friends. If you don’t have a Cricut or some of the tools I have, don’t worry. If you’re like me you’ll find a way around not having some of these tools.
Moving forward, the Cricut cartridge I’ll be using for the envelope is, “Just Because” Cards; and the paper I’m using for the envelope and card holder insert is the 70lb Kraft paper—my favorite paper!

After you’ve powered up your Cricut set the size to 4 inches, and select the ‘Canoe’ envelope feature and hit cut. Once that has been cut out, raise the size from 4 to 4 ½” inches, then click your shift button, and click <Pickle’s>. Then click cut. Once you’ve cut those out remove them from your mat, and score the envelope.
Next, pick your pattern paper! I love flipping through the pages of my paper stacks.
Once you’ve selected the paper you would like to use go ahead and choose a base color as well. I’m choosing pink as my base color. Remember to cut the base color smaller than the size of the envelope, that way you have a border; and do the same for the patterned paper as well (Make it smaller then base paper).
Then what you can do is use a brown chalk or ink around the edges to give it a vintage look (Optional).
Next I cut out a pretty shape that will be one of the main parts of the ‘Happy Birthday' Message. I cut these using my Cuttlebug.


Then I add a cute flower stamp with a very light pink color—for added cuteness.
Next I used a ‘Happy Birthday’ stamp with dark pink ink on a scrap piece of paper that is the same color as the base piece of paper (pink). Then hand cut that out and glue it to the shape stamped with a flower pattern like so:

Then what I like to do is use foam tape to add a 3D effect:

Then from this point, you can add a pretty ribbon or a cute hand-stamped message.

Then once you’ve decided to use the ribbon or the stamp go ahead and glue the entire piece onto your Kraft envelope.
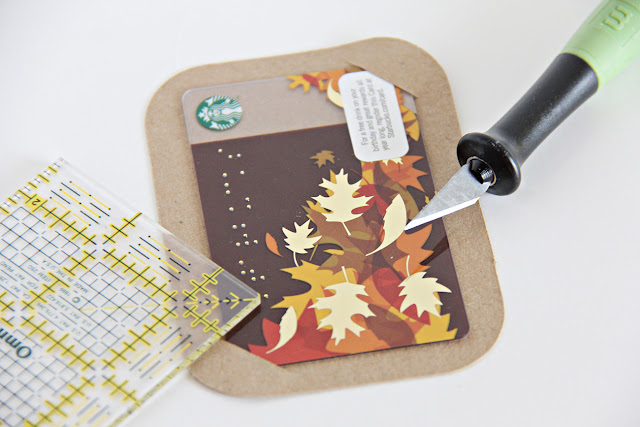
Lastly, go ahead and cut some corners onto the insert so you can easily secure the gift card, then you’re done!

I hope you’ve enjoyed this tutorial! I know I had tons of fun making this for my shop; and if you like this cute gift card holder but would rather not make it, feel free to stop by my shop and buy one!
Proudly designed by | mlekoshiPlayground |