Showing posts with label pink. Show all posts

Easy Easter Treats, Part 2, Rice Krispies Easter Bunnies

Monday, April 14, 2014

Its Monday once again and now Easter is even closer—but not to worry I have a really easy, yet super tasty treat that you can make for your friends and family for this special holiday (or even just for yourself, hehe). I went to Michaels and found that they have this really cute bunny shaped cookie cutter and it was only $0.99. I thought it would be perfect for creating Easter bunny themed treats.  The pink ribbon used for the bow is also from Michaels—you can find a wide variety of colors to choose from in their ribbon section.
What you’ll need:

Ingredients
3 tbsp. Butter
10oz. Marshmallows
6 cups of Rice Krispies Cereal
Cooking spray
Neon food coloring (optional)

Tools
Rubber spatula
Large bowl
Medium sauce pan
Wax paper
Cookie cutter 
Step 1: First thing is you’ll want to take your cooking spray and spray every single tool you’re going to use because this recipe can get pretty sticky and messy. Apply cooking spray to your sauce pan, bowl, cake sheet pan (or whatever you use), the spatula, cookie cutter, etc.
Step 2: Put your sauce pan on the stove and turn on the heat to low, add the butter and let it melt. Once the butter has melted add all of the marshmallows and stir frequently until they’re completely melted. It’s going to smell so good at this point! Once it’s been melted you can take it off the heat, and add the food coloring—but adding the coloring is completely optional.
 Step 3: Simply add the sauce into the bowl that has been pre-sprayed and mix all of the ingredients together.
Step 4: Add it to your baking dish. I placed wax paper on the bottom of the pan; namely, because I didn’t want a sticky mess on that pan. Then I spread out the mixture, covered it with another piece of wax paper and flattened it with another baking dish to make it evenly flat. Once that has been done, simply set is aside for about 20-30 minutes so it can cool down.
Step 5: Once it’s cool, you can begin cutting out your shapes with the pre-sprayed bunny shaped cookie cutter. I’ve seen man recipes that place the rice krispies in the refrigerator first but if you plan on cutting them with a cookie cutter I’d recommend simply letting them cool at room temperate. Once they’ve been cut, then you can place them in the fridge—if you like. 
 Step 6: Add some cute ribbon and you’re finished! If you’re making them the night before simply place them into an air tight container and place them in the fridge. On the day you plan on serving them take them out of the fridge to let them return to room temperature. Tip: This recipe will only last up to a week in the fridge.

Aren't they adorable?! They tasted so amazing, too. I almost couldn't stop eating the left overs but I HAD to, hehe. I hope you give these bunnies a try Easter. You and all of your loved ones will definitely enjoy them! 

Sending you buckets of Love...

Friday, November 22, 2013

Today I’m working with my Simon Says Stamp, stamp set and I’m having such a great time with them. This is the first stamp set that I purchased, of theirs. I really love the quality of these stamps and I’ve also already placed a huge order with them for more! I love that this set, LoveThis, has a couple different sentiments, shapes, and patterns so that we can create a line of cards that differ from one another. For instance, you can create a birthday card, an I love You card, a just because card, and so much more. 
To create this card I started off with a A2 white card base, and I cut another piece with the scraps to create the panel that will go on top of the card. Once those two pieces were cut I took the heart stamp and also pulled a few different Hero Arts shadow inks and began stamping the heart image using the generation stamping technique. Next I used some of my circle dies to cut the circle on the panel. I simply ran it through my Cuttlebug.
Next I used three of the sentiments—I stamped the, ‘Love’, and ‘sending you buckets of love. Save some for a bad day’, in some black dye ink, and the ‘Nobody gets me like you’ sentiment in some, Hero Arts, pink dye ink. Once they were stamped I let them dry completely and then I turned the panel over and applied some foam adhesive squares on the back so that the panel would have a 3D look.
Next, I placed the panel onto my card base and soon realized that my ‘Love’ sentiment was a little too far to the right, so I fixed that by placing some sequence on the left of the sentiment—balancing it.   

I forgot to mention that I used my glitter pen to color in some of the hearts on the card base—to add some shine. I love how it turned out and you can really see it in the image above. Well, that’s it for today. I hope you enjoyed this card. Thank you!

Affordable Last Minute Easter Cake

Saturday, April 7, 2012

     If you’re like me you don’t think of what you’re going to make for Holiday parties until the last minute, and this year I thought about making a cute—cheap, Easter themed Cake. If you have eggs and food coloring at home in your pantry already then this cake will only cost you a little over $5.00. To make this cake all you’ll need is:
·         2 boxes of white cake mix ($1.00 each)
·         2 containers or white icing  ($1.59 each)
·         2 or 1 small round baking pans
·         Food coloring
·         Vegetable oil
·         6 eggs
·         Water
What I did for the first batch was simply follow the instructions on the back of the cake mix box—once that was done, I divided the batter in half—in separate bowls, then added yellow food coloring into one bowl and pink food coloring into another. Then bake! Once they are out, wash and dry all the dishes and pans, then repeat—but with the purple and blue food coloring instead of the pink and yellow. Once they have cooled on a rack you can start icing. What I do is place the first cake layer facing up and then trim the top off to insure the cake will be level (I do this for each cake layer). After you have trimmed the first layer, simply spread about 2 tbsp of the icing on top then repeat those steps for the other layers. It should look something like this: (sorry for the poor image quality I did this last night and I didn’t have much natural lighting, lol).
Then from this point you can simply use the remaining frosting to finish it up. Then you are ready to serve or take it your party!


I hope you all have enjoyed this post—and I hope you have a GREAT Easter!
Also, stay tuned for……

Cute Gift Card Holder Idea for Cricut Users and Paper Crafters

Sunday, February 19, 2012

Hello! I’m excited to be showing everyone how I go about making my gift card holders. I’ve been working on a lot of birthday cards, toppers, and many other things. So, I thought I’d share this cute idea with all my Cricut/paper-crafting friends. If you don’t have a Cricut or some of the tools I have, don’t worry. If you’re like me you’ll find a way around not having some of these tools.
Moving forward, the Cricut cartridge I’ll be using for the envelope is, “Just Because” Cards; and the paper I’m using for the envelope and card holder insert is the 70lb Kraft paper—my favorite paper!

After you’ve powered up your Cricut set the size to 4 inches, and select the ‘Canoe’ envelope feature and hit cut. Once that has been cut out, raise the size from 4 to 4 ½” inches, then click your shift button, and click <Pickle’s>. Then click cut. Once you’ve cut those out remove them from your mat, and score the envelope.
Next, pick your pattern paper! I love flipping through the pages of my paper stacks.
Once you’ve selected the paper you would like to use go ahead and choose a base color as well. I’m choosing pink as my base color. Remember to cut the base color smaller than the size of the envelope, that way you have a border; and do the same for the patterned paper as well (Make it smaller then base paper).

Then what you can do is use a brown chalk or ink around the edges to give it a vintage look (Optional).
Next I cut out a pretty shape that will be one of the main parts of the ‘Happy Birthday' Message. I cut these using my Cuttlebug.


Then I add a cute flower stamp with a very light pink color—for added cuteness.
Next I used a ‘Happy Birthday’ stamp with dark pink ink on a scrap piece of paper that is the same color as the base piece of paper (pink). Then hand cut that out and glue it to the shape stamped with a flower pattern like so:

Then what I like to do is use foam tape to add a 3D effect:

Then from this point, you can add a pretty ribbon or a cute hand-stamped message.

Then once you’ve decided to use the ribbon or the stamp go ahead and glue the entire piece onto your Kraft envelope.
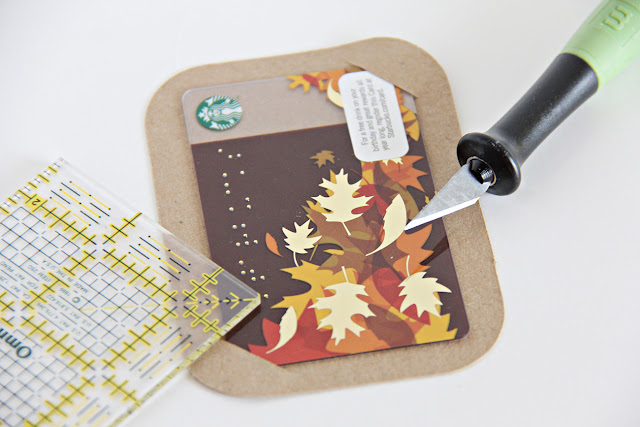
Lastly, go ahead and cut some corners onto the insert so you can easily secure the gift card, then you’re done!

I hope you’ve enjoyed this tutorial! I know I had tons of fun making this for my shop; and if you like this cute gift card holder but would rather not make it, feel free to stop by my shop and buy one!
Proudly designed by | mlekoshiPlayground |