
Showing posts with label paper crafts. Show all posts
Showing posts with label paper crafts. Show all posts
Baby Shower Cupcake Toppers with Precious Remembrance
Sunday, June 2, 2013
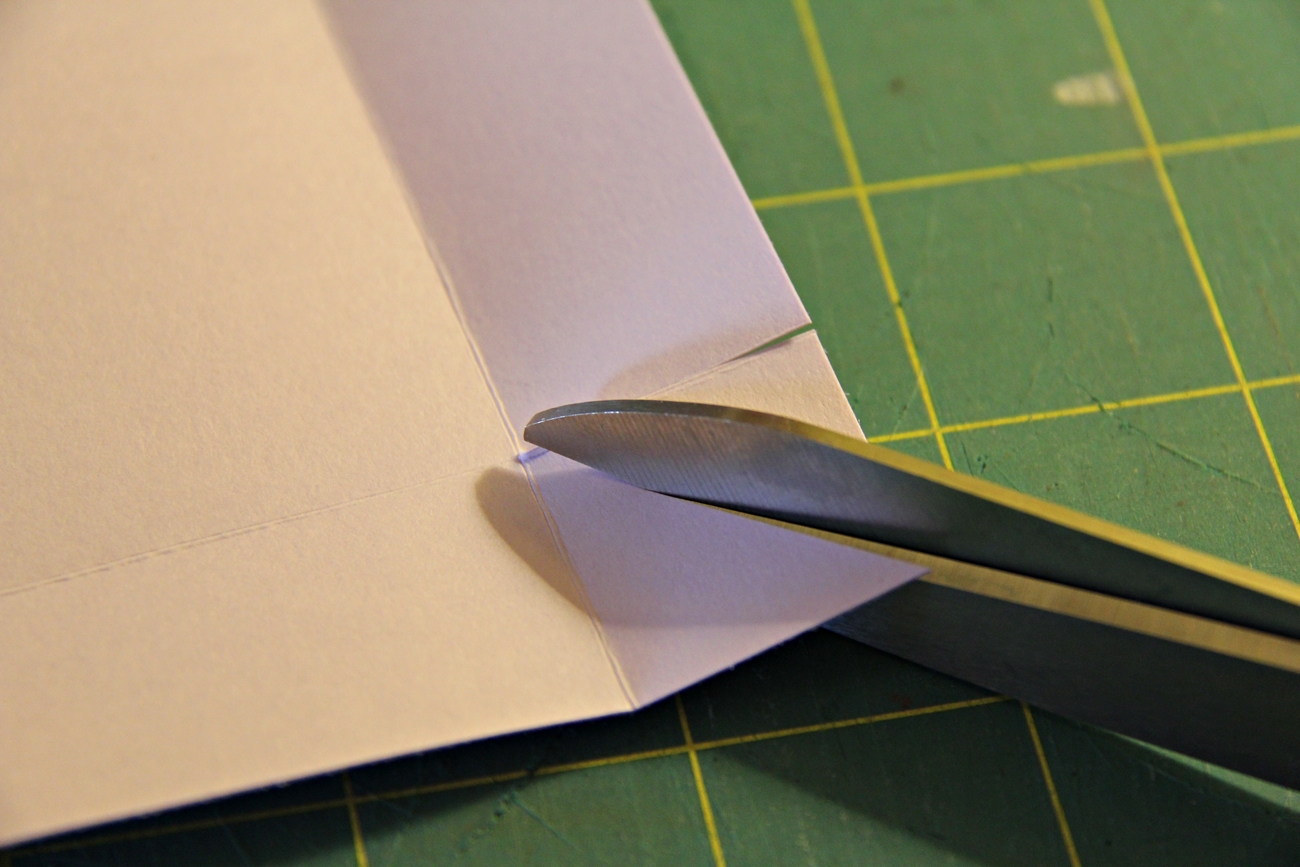
How to Make a Card with a Pocket
Friday, April 26, 2013


There you have it! I also bought some small envelopes that
fit nicely inside. I think I’m going to be making a lot of these for Birthday’s
and for Christmas too. I hope you've enjoyed this tutorial, let me know what
you think in the comments. Have a great weekend.
Organizers from the Dollar Store, Perfect for Paper Crafters
Monday, March 25, 2013


 I also purchased these lock lid food containers to store my embossing powders. I wasn't using my powders as much because it was a hassle to clean up after each use; so, this will be much easier.
I also bought these really long containers to store my cards, templates, unfinished pouches, card bases, and ready to ship tags.

Lastly, I bought these little mini containers to keep my
cloud embellishments, die cuts, and ready to ship toppers in. I really like them,
and I feel like I have so much space now. Having everything easily accessible
makes my work flow much better.
DIY—Handmade boxes!
Thursday, June 28, 2012

Hello everyone! I’m so excited to be back with this really easy—yet super fun, tutorial. I’ve always been interested in making my own card boxes; and one day I felt like searching the sea of videos on Youtube to find a quick, easy, and fun handmade box tutorial. When searching, I came across this really cute duo, from the UK, that has a blog and Youtube channel dedicated to handmade crafts; and, I immediately feel in love with them. They’re so cute, funny, and delightfully entertaining. You can find them here and here.
What I did was take the box making instructions they’ve provided and made a box according the dimensions that I needed. I wanted to make a box for my handmade ‘Thank you’ cards, but I also wanted room to include handmade envelope seals and a black and white bakers twine for a little added cuteness.

For this tutorial I’m going to simply show photographs of how I made these boxes, but you can check out their video for detailed instructions on how to cut and assemble these boxes. I don’t want to take full credit for these—I’m hoping to get them the exposure they deserve for this wonderful idea. You can click here for the video.
Enjoy!


Now wasn’t that just the cutest?! I love that I know how to make these now—these would work great a gifts, favor boxes, and so much more. I hope you give this a try! Happy Crafting!
DIY Cupcake Décor for Brides on a Budget
Wednesday, June 6, 2012

Wedding season is here—and I’m so happy that the DIY 100% handmade scene has been spreading rapidly these past years within the nuptial world because that means I get to share my DIY projects with you all! Brides today not only want a beautiful and unforgettable wedding, they also strive to have the most unique handmade items that can’t be bought anywhere in stores. Handmade favors and décor are now signature stamps of individuality at weddings—and that makes them even more exciting to attend.
DIY favors and party décor are not only 100% OOAK—they’re also relatively cheap to make! And not spending excessive amounts of money in the favors and décor department can help if you’re on a budget. So, today I wanted to share a simple yet stunningly beautiful cupcake topper that is sure to make guests’ huddle around your desert table.
Let’s get started!

1. Your choice of glitter paper (There is an ultra wide variety of glitter paper at most Joann’s craft centers)

2. A heart shaped craft punch (Can also be found at your local craft store or online)

3. Toothpicks

4. Glue (I prefer to use Tacky glue when paper crafting—it dries fast and clear)


Step 1: Punch your hearts out (LOL, that sounds funny)


Step 2: Place some glue in the middle of your heart and add a toothpick. Once you’ve applied to glue and picks to the amount of hearts needed let them dry for about 20-30 minutes.

Step 3: Apply the glue to another heart and just match it to the back side of the heart covering the toothpick.


Wow! That was easy. Once they’ve dried they’ll be ready to insert into your cupcakes like so…


So cute right?! Doesn’t the glitter leave you mesmerized? LOL. Well I hope you’ve enjoyed this mini tutorial and hopefully this DIY project will spark more ideas in your creative mind!
Subscribe to:
Comments (Atom)