A Great Place to Shop for Craft Supplies in Los Angeles

Sunday, February 12, 2012

     This weekend I decided to put down my crafting tools to go on a mini shopping spree for my shop. I absolutely love that fact that I only live ten minutes from Downtown Los Angeles because of the amazing craft, fabric, and hardware stores that the city of L.A. has to offer. This weekend I stopped at one of my favorite shops to buy ribbon—Moskatels.  Moskatels is a store that has everything for ones crafty or party planning needs. I like to think that the big-gun party planners of Hollywood stop at this location because of some over the top pieces Moskatels’ carries that only celebrities can afford to buy. However, aside from some of their vases I could never afford; they have a ribbon isle that must have come straight from heaven. The array of colors and modest prices simply have to be heaven sent. I feel like a nerd when I say that I get the chills walking down the ribbon isle, but if you have a passion for all things crafty the way I do you’ll understand my excitement when I walk into this: 
I wish I had better pictures of this store, but like most places of business downtown they frown upon customers taking pictures of their amazing products. But, I managed to sneak a quick photo with my point and shoot camera—hence the poor image quality. This store has everything you can think of: ribbon, baking supplies, all party supplies, a wide variety of item boxes and baggies for crafters and bakers, and so much more.

I’m so glad I went shopping at Moskatels this weekend because while I was browsing the store I found these clear poly bags that I’ve been looking for everywhere. I wanted these poly bags to hold all the cards, tags, and cupcake toppers I sell, and I’m so happy I found them here. The poly bags I got make my items look so much more professional, and they’re perfect for a craft fair I’ll be doing soon. I want to post more photos of the bags I’m speaking of. Maybe I’ll do a quick tutorial on how to use them to wrap cards and other items.

Thanks for stopping by for a quick read, and if you love crafting or party planning as much as I do this place is a must! Let me know what you think if you happen to stop by Moskatels when stocking up on tools. Also, let me know if you know of other places just like this—I’d love to check them out.
F.Y.I. Moskatels has a parking garage and the parking is free for up to two hours if you spend more than $4.00. If you try to park anywhere else it’ll either be a hassle or expensive.

Product Gift Wrapping Part Two

Thursday, February 9, 2012


Hello! I hope everyone is having a great day! In my previous post I said I was going to share a video I recorded of me wrapping some stationary and here it is. I hope you enjoy it, and stay tuned for another. I’ll be showing how I wrap my tags and cupcake toppers with poly-bags, card stock, and stamps.

Product Gift Wrapping that’s Adorable & Affordable

Tuesday, February 7, 2012

As a seller I’m always looking for cute ways to wrap my sold merchandise before it’s shipped. I’ve tried lots of different ways to wrap my cupcake toppers, zipper pouches, stationary and more; but lately I’ve discovered that using wax paper to wrap most of my items looks so cute, and one roll of wax or parchment paper can go a long way—which allows me to save money. I snapped a few pictures, over the weekend, of the tools I use to wrap a zipper pouch and the end result. I hope you like it!
What I love about using wax paper is: it keeps the product safe from dust, debris, and possibly water as well. But not only does the wax paper serve as a good protector, it also looks cool because the wax paper is transparent.  Try using wax paper when wrapping your next order and share you pictures here! You can contact me when the images and I’ll share them on my blog.
Today while I was getting an order ready for shipment I thought I’d record the entire process. So, I’m going to get started on editing that video so you can see how I go about wrapping stationary as well.
Stay tuned for my video to see how I use wax paper to wrap stationary. Also coming soon, a video showing how I wrap my cupcake toppers using poly-bags, card stock, and stamps!

Dressing Favor Boxes

Tuesday, January 31, 2012


I wanted to share this cute idea I had in mind for the favor boxes I sell on my website. I received an email from the Etsy Press team asking if I would like to be involved with an ad they were going to run with an online newspaper; and the specific item they had in mind for their ad was my Valentine’s Day favor box. So I figured it would be a good idea to add a photo onto my Etsy page with a cute idea on how to use these cute boxes—and I want to share those pictures here too!
What I used:
My Valentine’s Day themed Favor box
Clear candy bags
Cookies
Ribbon
Tags (Optional)
I love these boxes, and this idea works well with other boxes as too. So whether you have a Cricut cartridge like me, or you find favor boxes somewhere else you can use this cute and simple idea for weddings, Valentine’s day, and even Christmas (Of course with different colors and stamp designs).

My Blue Valentine Edible Cupcake Topper Tutorial

Saturday, January 21, 2012

When it comes to Valentine’s Day many individuals like to make their special someone something from the heart—something they can make with their own hands. Baking is one of the best ways to express our love, and I have a fun, easy, and affordable way for you to spread some love around.
What you’ll need:
1.       Mini Crockpot or double boiler.
2.       1 bag of candy melts
3.       Glue
4.       A ceramic cup with a spout
5.       Squeeze bottle
6.       Wax paper or parchment paper
7.       Heart cut-outs and scrap paper
8.       Tray
9.       Iced cupcakes
Step 1: Glue your heart cut-outs onto your scrap piece of paper, leaving enough space in between each heart.
Here is an example of what it should look like:
Next, place your paper with the glued hearts onto your tray, and then place a piece of wax paper over hearts and set aside.
Melt your candy melts over a double boiler (instructions for double boiler is on the back of the candy melts package), or in your mini Crockpot. Once the candy is completely melted pour it into your ceramic cup. Tip: What I like to do is place my ceramic cup into the microwave for a minute or two—bringing the cup to room temperature.
From this point, transfer the melted candy into your squeeze bottle.

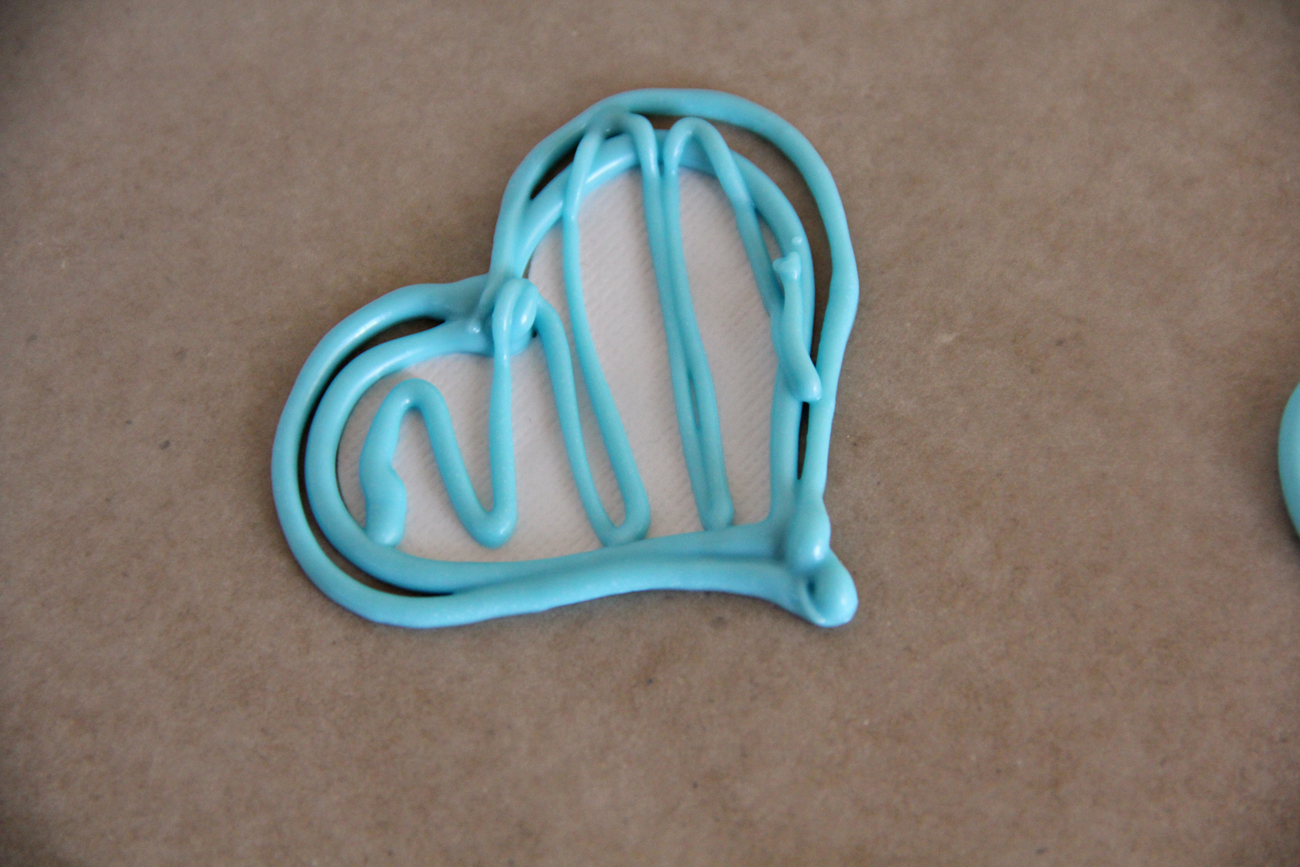
Now you can begin to trace the hearts on the wax paper using the template you made.
Front this point you can leave it the way it is, or you can fill in the heart with a creative design like so:
Once all your hearts have been drawn let them set for 15 minutes at room temperature. Once they have hardened you can gently remove them with a spatula, and then decorate your cupcakes! Here are two ways to lay your edible cupcake toppers.
I ended up having a little bit left over so I had fun with free hand designs in the end and this is what I came up with!
I hope you enjoyed this tutorial/idea. I certainly had a lot of fun making them and sharing them with my friends and family. Also, don’t let the fun end here. Think of ways you can use this idea for other holidays or even birthdays!
Till next time ;)

Ideas for heart embellishments

Saturday, December 24, 2011

Hi everyone! I just wanted to share this cute collage of images I made with ideas on how to use some of the heart embellishments that are for available on my website.  Valentine’s Day is nearing and these are cute ideas for the upcoming holiday!

Etsy Christmas Rush--So far so good & Announcement of Upcoming Items

Wednesday, December 7, 2011

Hello! I haven’t been around lately to fill the pages of my blog; however, I have a good excuse. I’ve been working hard on making new items for my website, shipping holiday items, and marketing my products. My holiday rush turnout was great, and yes I may not have had a huge amount of sales but it’s a start! I do feel that I have learned my lesson and next year I think I’ll be ready for the Christmas rush 3 months in advance. Here are a few of the items that I sold for the holiday rush—and I’m so proud.
Today I finished shipping may last custom order for this week (or maybe the last custom order for Christmas, we’ll see), so I started cutting fabric to make some more point-n-shoot camera cases in the meantime. I couldn’t believe how fast the first four I made sold out! Therefore, I have 10 more in the making.  One of the cases I’m working is going to be a surprise. You see, I took a picture of the camera cases that I’m working for my FB fans—showing all the fabrics and everything. But, I left one out. It’s a secret fabric and I know it’s going to be a hit! Or at least I hope it’s a hit—sometimes I have these visions of things in my head and then when I make them, they don’t work out, so let’s hope it does.
Moving forward, after I’m done with these cases I’ll begin to work on my Valentine’s Day collection. I’ve learned from my past mistakes, as mentioned before, and I’ll be ready for Valentine’s Day for sure. I have a list of items I want to make, and they are as follows (all V-day themed of course):
·         Tags
·         Cards
·         Gift card holders
·         Pouches
·         DIY cupcake kits
·         Cupcake toppers
·         And I guess whatever else I come up with after that
But rest assured I will share my ideas, and maybe even create some cute V-day themed tutorials with you all! I can’t wait. Ugh, I love holidays!
Proudly designed by | mlekoshiPlayground |