Showing posts with label unifyhandmade. Show all posts

Lots of Changes

Monday, July 14, 2014

Finally! I feel like I can breath again (when it comes to my blog). I've been wanting to give it a little make-over for some time now, and I've finally got around to doing it. I was beginning to notice that so many changes were happening in my life, including my look. I didn't even look like the same girl (in my old blog image) and I also felt like my over aesthetic as a designer was changing as well--so I felt that I needed to reflect that in all other areas of my social media sites. Well back to my new look! My short hair grew out and I was starting to fall in love with the ombre hair look--especially since it's summer, and I decided to get my hair done. It's been so long since I've my hair this light. I think the last time I had hair this bright was in high school (in high school I had hair color in almost every single color--the worst one being green, hehe). I also starting working out everyday and eating clean. I was getting so tired of being overweight and unhealthy--so that's also another aspect that has changed, in my life. I definitely feel so much happier, clear headed, and healthier since I made the decision to really take care of myself.

I was beginning to wonder if that may have been one (of the many) reasons why my blog took a back seat--there were so many changes going on in my life and I wasn't sure were my blog was headed. I think when I originally started this blog I wanted it to be a mix of food posts', posting about fun DIYs, my handmade items for sale, etc. but somewhere down the road I feel like it mostly became a blog about me making cards--at least that's how it felt to me. I think now I'd like to make it more about posting anything that I want, haha. The way it was in the beginning.
One other change in my life was the growth of my small business. When I first started my business I never thought I could actually turn it into a full time job. I guess I thought it would be nice if it did turn into something "real" but to me it seemed like a dream. Now it's real I'm so thrilled to be doing this full time and perhaps also getting a little freaked out, at the same time, because now I need make sure I really take care of it (not like I wasn't already taking care of it) but maybe what I'm trying to say is that I need to finally come up with actual branding for my company. Branding was something I always had on hold, I think because I never thought I would get this far. Below is an image of what I like to call the beginning stages of branding...I found a font I like that I feel represents my work--clean, fun, and professional.
 If you follow me on Instagram you may already know that I'm going to be selling made in the USA rubber wooden mounting stamps that I designed, and below is a sample of the first set that will be coming out soon--in my shop. Also, if you follow me on Instragram (@unifyhandmade) you'll notice I've been making lots of new items but you haven't seen them in my shop yet. That's mainly because I'm gathering a collection of items to release all on the same day. I feel that's more of the legit way to go, hehe, rather than my old approach of just uploading new things one by one when ever I felt like it. I would like to make these stamps for shop owners, and the occasional stamper; for stance, someone helping out with the party decorations for a wedding, or a baby shower. That's actually how I developed my love for stamps and papercrafting. I was in charge of a baby shower and I went to Michaels one day looking for bumble bee stamps for the 'Bumble Bee' baby shower theme I'd planned. After that party--I was so sad because I wanted to make more bumble bee tags, and favors but there wasn't a need for me to do them anymore; and, I decided to create an Etsy shop selling handmade tags, toppers, etc. because I loved making and designing them so much. Now Unify has taken off and I couldn't be happier. I'm literally busy from morning to night, working on orders, answering emails, posting on all my social media sites, packaging, taking pictures, listing products, driving to the post office, coming up with new ideas--it's endless. But I'm so happy doing it!
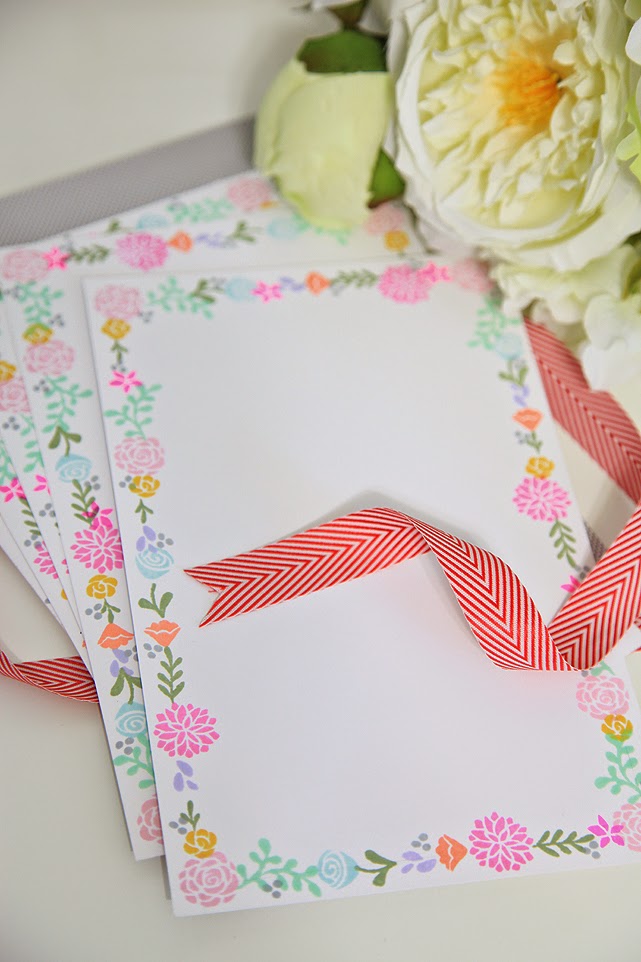
I've also got a new line of bridal cards coming out along with all the other new products--and I love them so much. I'm really obsessed with watercoloring right now and it's definitely coming out in my work, hehe.
I'd like to take the time now to ask if you there is anything you'd like to see me posting about? Whether it's about being a shop owner, what camera I use; or, any other questions you might have for me. I'd be happy to create a post and answer any questions you all might have. I would definitely like to post more about how I've changed my eating habits, and everyday things that are going on--what do you think? Let me know in the comments!

Work and New ideas

Friday, June 13, 2014

I thought it would be fun to take a few snap shots around the office, of things I’m working on as well as things that are “in the works”. I’ve been coming up with new ideas in between making and sending out orders on a daily basis—and it’s so much fun. I’m such a lucky gal to be able to do what I love, full time. I enjoy working on orders so much because I know that each little card or decoration will make someone really happy; and, that makes me happy! I’ve been thinking of lots of new things to add to my shop that will take my small business to the next level. I was beginning to get a little bit bored of making the same things over and over, and my remedy for that situation was to begin making new things that would get me exciting again. So far I’ve thought about making more wedding items—but I’m starting off small. By that I mean I’m not going to jump right into making invitations. Instead I’m going to create ‘Save the dates’ first and go from there. I’m also thinking about offering envelope printing in my shop as well. I’ve got such beautiful fonts and I know that, for a bride, handwriting invitations can be a bit of a pain. So I tested out the thick A2 envelopes that I purchased from Paper Source and they came out great. I was so happy with the results but I still need to work out a few kinks because sometimes when I’m printing on envelopes my printer tends to smear ink on them—I should probably contact the manufacturer about that.
I’ve also wanted to incorporate my new found love for watercoloring into my shop. So I also tested out printing on watercolor paper. What I did was apply the watercolor onto the paper first, then once it completely dried I printed the sentiment on it using my Canon printer—and again I loved the end result.
Here I have two little banners I made using a printer and the new Lawn Fawn banner dies. I think these are so cute and I’m going to try making these banners is more colors (cardstock). I can’t wait to add these to my shop—and of course I’ll be taking better pictures of them for my shop, hehe.
I’ve also been trying to get into drawing, here and there. I used to love drawing when I was younger and I was actually really great at it but I kind of lost it and now that I’m getting more into printed designs I’d like to get back into doodling. I love doing this when I’m a bit stressed out too because I don’t really expect much to come of it I just have fun creating little designs and then just set them aside.
The last images are just a few snap shots I took while I was working. I figure if I don’t have time to do tutorials or make cards I should at least share what’s going on in my office. While owning a small business can be stressful at times it’s also rewarding so many ways that the stress is nothing compared to how doing what I love makes me so happy. Well, I hope you enjoyed this little post and feel free to leave me a comment. Till next time, friends! 

Handmade Stationary Set, A perfect Mother's Day gift

Thursday, May 8, 2014

Today I have really quick & easy tutorial for you! I made a video for the Lawn Fawn blog on how to make handmade stationary using the LF stamp set, Penelope's Blossoms. Scroll down to watch the video! 


I hope you enjoyed this video! I wasn't able to post this past Monday, and Wednesday but I'm going to post tomorrow for 'One card a Week', so stay tuned. 

Pretty Pink Posh Grand Opening Blog Hop!

Sunday, December 1, 2013

Today I’m excited to be celebrating the grand opening of the Pretty Pink Posh, Shop! As a crafter it’s always fun to use embellishments and PPP has lots of sequins and things for you to choose from for all of your creative projects. You even have a chance to win Pretty Pink Posh prize packs—so don’t forget to check the details on how to win below.

I've recently started using sequins on my projects and I love it—so this celebration couldn't have come at a better time. Since we’re on the topic of celebrating I’d like to share my first project using some of the PPP sequins from the, Winter snow, pack which I used to create a festive place card shaker—Perfect for Christmas dinner. I love it because it’s a playful place card and I’m sure something like this would bring a smile to anyone’s face. You could have the shaker place card standing up in front of a place setting or even right on top of the actual place setting. Either way is super cute and I can’t even decide which one I like best. 
Since I was on the theme of Christmas I thought I’d create a cute tag for a gable box, and I used PPP, Festive Holly-days, sequins, and some of their adorable Christmas bells. The sound this little bell makes warms my heart so much and it’s seriously getting me in the mood for Christmas (my favorite holiday).
Now is your chance to win your PPP packs! You can simply leave a comment on this post on or before December 3rd and two lucky winners will be chosen and announced on Thursday, December 5th! For more details on how to win, visit the Pretty Pink Posh blog be clicking, here.
Now on to the next crafty gal in the hop! Laurie Willison is going to share what she created using PPP embellishments, and to view the blog creating before me stop by Leigh Penner’s blog. If you would like to start from the beginning click here!


This hop was so fun, and I hope you enjoyed it as much as I did!  

Sending you buckets of Love...

Friday, November 22, 2013

Today I’m working with my Simon Says Stamp, stamp set and I’m having such a great time with them. This is the first stamp set that I purchased, of theirs. I really love the quality of these stamps and I’ve also already placed a huge order with them for more! I love that this set, LoveThis, has a couple different sentiments, shapes, and patterns so that we can create a line of cards that differ from one another. For instance, you can create a birthday card, an I love You card, a just because card, and so much more. 
To create this card I started off with a A2 white card base, and I cut another piece with the scraps to create the panel that will go on top of the card. Once those two pieces were cut I took the heart stamp and also pulled a few different Hero Arts shadow inks and began stamping the heart image using the generation stamping technique. Next I used some of my circle dies to cut the circle on the panel. I simply ran it through my Cuttlebug.
Next I used three of the sentiments—I stamped the, ‘Love’, and ‘sending you buckets of love. Save some for a bad day’, in some black dye ink, and the ‘Nobody gets me like you’ sentiment in some, Hero Arts, pink dye ink. Once they were stamped I let them dry completely and then I turned the panel over and applied some foam adhesive squares on the back so that the panel would have a 3D look.
Next, I placed the panel onto my card base and soon realized that my ‘Love’ sentiment was a little too far to the right, so I fixed that by placing some sequence on the left of the sentiment—balancing it.   

I forgot to mention that I used my glitter pen to color in some of the hearts on the card base—to add some shine. I love how it turned out and you can really see it in the image above. Well, that’s it for today. I hope you enjoyed this card. Thank you!

Gnome for the Holidays

Thursday, November 21, 2013

I know Thanksgiving hasn't even passed yet but I still can’t help but make holiday cards over and over again. After all, Christmas is nearly around the corner. Before we know it, Thanksgiving will have come and gone and December 25th will be coming in faster than we realize. Especially if you’re a seller like me—getting holiday cards done in advance is the only way I’ll be able to send anything to my friends and family in the mail. Once orders start piling up I won’t have time to make cards at detailed as this.
This is actually my first circle card, and I learned how to make them by watching one of Lawn Fawn’s awesome videos on the subject. You can learn how to make it by watching this video (skip to minute 7:00 to learn how to make the shaped card). I've learned so many techniques from watching card making videos by Lawn Fawn, Simon Says Stamp, and many other amazing crafters out there in the YouTube world. If you’re interested in learning more card making techniques videos by your favorites card making artists will definitely help. To create this lovely card I used the following stamp sets by Lawn Fawn: Gnome sweet gnome, Let it snow, and Trim the tree.
I also used an embossing and distressing technique to create the blue sky in the background of this card. I've never been that great at working with distress inks but watching videos on how it’s done has given me the confidence to give it a try. I also did a lot of fussy cutting and paper piecing on this card—and that’s also something I've learned from watching YouTube videos. Before Lawn Fawn videos I had no idea what paper piecing was, hehe. I used a variety of Copic makers to color in the gnome and his cute little home. I also used my new wink of Stella glitter pen (in clear) on the snowy hills but the camera didn't do a great job of picking up on that (actually it’s probably my fault that you can’t see it, not the camera’s, haha). But in person the snowy hills shine so beautifully—this glitter pen is magical. To create the perfect circles I used some circle dies that I purchased from Michaels with a 50% off coupon but you can buy those at many online and local craft stores.
The distress inks I used to create the blue sky are: Peacock features, and Broken china. If you’re new to distressing you may want to watch some videos on how it’s done there are lots of awesome videos on the subject. I hope you loved my gnome Christmas card. I fell in love with this card right away and I’m seriously thinking of making many, many more to give to mail for the holidays. 

Card of the Week--Mommy to Bee

Monday, November 4, 2013

Even though it’s so gray and cloudy today in Los Angeles County, I was still able get a little sunshine from this bright and colorful card I made using some of my Lawn Fawn stamps, and paper. Nothing makes me happier than using bright and happy card stock—plus Lawn Fawn stamps always manage to put a smile on my face all on their own anyway, hehe. When I was creating this card I was a little bit worried that I might be using too much black and yellow combos—but in the end I really like how it turned out. I think one of my favorite things on this card (texture wise) is this chevron screen printed clear overlay that I received in one of the Simon Says Stamp collection kits. If you’re interested in it you can find it in the SSS April 2012 collection kit (but it might be sold out). It was my first time using an overlay on a card and I think I've fallen in love with them. I’d really love to get my hands on more, in different patterns and colors.
 I always love ‘punny’ cards and I thought this bumble bee bear would make for a cute ‘Mommy to Bee’ card. To create the sentiment I used the stamp set, Milo’s ABC’s, by Lawn Fawn. This set is great! The other stamps sets I used for this card are: Critters in Costume, Home sweet home, and A birdietold me. I’m also using the beautiful yellow and white polka dot pattern paper from the LF, Pink Lemonade petite paper pack which I think goes perfect wit this theme—and matches great with the clear chevron overlay.
If you follow me on Instagram you already know that I purchased three new copic markers and I used them to color in the bear portion of the bee image. I’m still not that great at blending and shading but I’m workin’ on it, hehe.
Other elements I used when making this card are the super cool Lawn Fawn trimmings, Silver Sparkle single cord. I love the silver in this twine, I think it’s so pretty. I also purchased a ton of sequins lately because I want to start incorporating them into my cards, cupcake toppers, and other projects. So I have lots of it now. I hope you enjoyed this ‘Card of the Week’, and if you have any questions let me know in the comments. Have a great day!

Card of the Week--Miss You

Friday, November 1, 2013

I had a blast making this card! I feel like I haven’t taken the time to make an intricate card in a while—so it was about time I did. It may not look as though this card took hours upon hours to make but it did, hehe. It’s really nice to spend a good 2-3 hours on one card because I feel like it’s a therapy for me. I think the therapy part actually comes from me making a huge mess of all my stamps, paper, ink, etc. I don’t usually get messy when I’m working on orders because I feel that keeping everything neat and organized—as I work—helps me to finish them faster. 
I used so many stamp sets by Lawn Fawn for this particular card and the list of stamp sets used is as follows: Yeti set go, Into theWoods, So much to Say, Let it snow, You’ve got mail, Plus one, and Bannerific. I also used the new LF, Journaling die, you can find it by clicking here
I just love how this card came out, and I’m so excited that I used the yeti stamp for something other than Christmas—that’s something I love about LF stamps. They’re usually good for all year round projects. Well, I hope you enjoyed this card of the week and let me know what you think in the comments! Have a great weekend. 

Card of the Week, and Lawnscaping Challenge No.64

Wednesday, August 21, 2013

I recently made this mini-greeting card; namely, because I’ve been feeling like it’s been so long since I made a card just for fun—and it was about time I did! Sometimes I forget that I need to step away from making things for my shop, and make something for myself that can keep my creativity flowing. I feel that, that is an important thing to do—especially if I want to keep on creating new things for my shop.

I also noticed that Lawnscaping is currently hosting a fun challenge where you create a card using distress inks, and since I have a few distress inks I thought I’d give the challenge and try. I’m not too sure that I’ll win though, because while I did use 3 different distress inks you can’t really notice it that much. When I was making this card though, I just had fun and didn’t worry too much about how much or how little I was using distress ink—I mainly just wanted to have some fun. 
So, as you know I’m a huge fan of Lawn Fawn so of course I had to use my LF: stamps, paper, and twine! Here’s how I made the card: I cut a piece of card stock at 9 1/2” x 3 1/2”, and scored it length wise at 4 3/4” and set it aside. Next I cut a piece of yellow pattern paper from my Pink Lemonadepetite paper pack by LF, and cute it at 4 3/4" x 3 1/2" and set that aside as well. Next I grabbed my LF stamp sets: a birdie told me, say cheese, and critters in the forest and stamped out two of the Polaroid image, one fox, and one small text bubble on a piece of white card stock. Next I cut out the picture part of the polaroid image on one of the two images, and stamped the stump, and the tree as the background. Next I stamped the same images onto a piece of post-it paper and cut those out to use them as a mask so I could apply my distress ink colors, Broken China, and Peacock Features. Next I used a LF stamp and the distress ink to apply the stars in background. Once that was finished I removed the masks’ and colored in the tree and stump. Next I colored in the fox image, and the text bubble, then cut them out leaving a white boarder—I also cut out the full size polaroid image, too. Once all of that was cut out I adhered everything together, and applied some, Antique linen distress ink all around the polaroid image to make it look a bit vintage. Using the same Antique linen ink I grabbed a camera image from another one of my LF stamp sets and stamped that image three times at the bottom of the pattern paper to emphasize the polaroid picture. Next I wrapped some mint LF twine around the pattern paper, and adhered the image to the yellow panel using some foam adhesive, then adhered the whole thing to my card base, and it was finished!


Once this was done, I was so happy with it. I can’t wait to give it out. Isn’t it cute?

Unifyhandmade, Now on Instagram

Monday, July 29, 2013

Hi everyone, I've finally created an instagram for my blog/shop. You can follow me at Unifyhandmade. I'll definitely be sharing more 'behind the scenes' pictures of what I'm doing daily for my shop/blog. Feel free to follow! 
Proudly designed by | mlekoshiPlayground |