New Product Packaging for Christmas Orders and New Stamps in the Mail

Friday, November 30, 2012

Gosh, I’m so tired right now. I’ve been getting so many orders and I’m so excited about that! Even though getting orders back to back means my work hours turn from 8 hours a day to 18 hours a day, it’s still super fun—tiring but fun. One of the #1 seller’s in my shop at the moment is my Hipster Snowman Card set. I wanted to make a set that wasn’t too expensive because I know that handmade holiday cards can sometimes be expensive; namely because us card makers put tons of details into some of our cards. However, with this card I wanted something cute, sweet, and affordable. So, I made this card a single layer, with light coloring, and simple paper piecing. I’m so in love with it. I ended up making 200 of these cards in less than 24 hours—and I couldn’t believe I did it. My neck and hands were go mad at me after that, hehe. As a matter of fact they still feel mad at me right now, haha! Well I’m hoping to get more orders for these soon. This years’ Christmas season has been so good to me; and, it’s not even December yet. I’m so grateful. 
I also decided to change up my thank you packaging labels for the holidays. This time around I changed the ‘Thank you’ sentiment for the ‘Thanks’ text bubble sentiment. I love these sentiments so much because you can’t buy these. These are free gifts you get when you purchase Lawn Fawn stamps, but you never know which one you’re going to get when you order. I remember when I got this text bubble stamp I was super excited—cuz I had been waiting for this one, hehe. I’m also using Kraft bags as envelopes for my card sets, then I add some red and white bakers twine, and matching red and white chevron washi tape. I love how this looks like a vintage package because of the Kraft envelopes. It looks so cute to me. To view the stamp sets I used for this thank you label click here, and here. To buy the same kraft bags I purchased you can find them here. How are you packaging this year? 
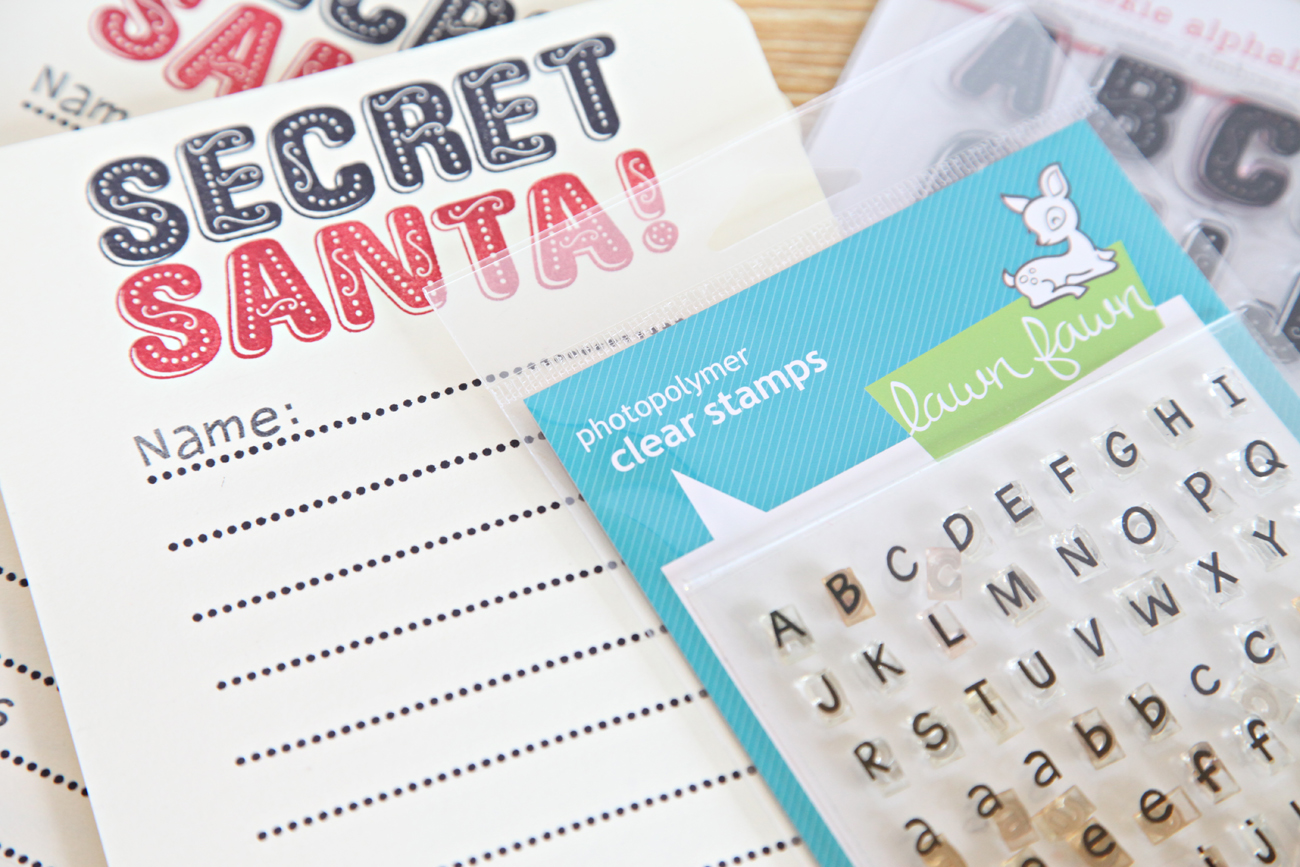
After shipping all my orders for the day I was so happy to come home and see a couple packages waiting for me in the mail box. One of them was this super, super cute Lawn Fawn stamp set that I’ve wanted for some time now + this order came with a free Lawn Fawn button!!! I can’t wait to use it. I wish I could buy all the Lawn Fawn stamps at once—but I must control myself, LOL. I’m super excited to use these for Valentine’s Day cards. Yay! 

Handmade Reusable Zip Lock Bag

Wednesday, November 28, 2012

I like using zip lock bags to store things, and one day I thought it would be nice to simply make one out of clear vinyl so I could use it over and over again. Not only can I use it to carry some of my crafty items but it’s also cute enough to use as an oversized clutch—thanks to the hand painted design I added on the front—using Martha Stewart multi-purpose paint. I made this clear case the same size of as a 2 gallon zip lock bag—so it’s big enough to carry toiletries if you’re traveling too. I had so much fun making this case because I was simply painting and letting my brush flow freely to get the design.  I’m looking forward to making more like it but in different sizes. I’m also thinking about trying different colors paints as well. 

Making Flyers for My Holiday Items and New Christmas Cards

Monday, November 26, 2012

Hi everyone! Business is starting to pick up over on my side of the virtual selling world, now that Thanksgiving is over; and, I've been working on orders almost 24/7 because they’re coming in so fast—and I’m grateful for that—but I've been having a hard time keeping up with my blogging. I have so many Christmas DIY’s and Tutorials in store and I’m trying so hard not to let work stop me from doing them, hehe. What I've done again this year for Christmas is create some really cute and simple flyers for my shop. I've been passing them out and even taking them to my local shops and posting them up on the community boards. Did you know that most local places have a community board? I know that almost every single Starbucks has one, but in L.A. there are tons so I’m stopping by every shop to spread the word about my Etsy store. 
I've also be so busy with orders because of these new cards that I have available in my shop. One of the hot sellers in my shop right now is my hipster Christmas cards, hehe. They’re so cute! I love them. I love making these single layer cards now, and I think I’m even going to add more of a variety in my shop very soon. 

Lace Theme Thanksgiving Decor

Friday, November 23, 2012

Hi! I hope you had a great Thanksgiving. A few posts’ ago I mentioned that the theme for this years’ Thanksgiving was going to be lace, and that I also wanted to incorporate the colors light green and light orange. However, those colors are pretty difficult to find when you’re on a tight time frame and I had to accept using regular orange and green accents instead. I didn't mind though, because those darker shades are still great for Thanksgiving. So, I started the morning by making 3 flower arrangements for the main table, and when I was at the flower mart I was looking for light oranges and greens but couldn't find them so I just went simple and found the closest thing I could find. I’m not that great at flower arranging but I always have fun doing it, hehe.
I also wanted to have little lace accents here and there so I went to the dollar store and bought two scented candles and a pack of lace. All I did for these was remove the wrapping, cut a piece of lace that fit perfectly around the candle and applied adhesive to the lace using my tape runner, and placed it onto the candle—it worked so well!
 Next I made some treat bags and used my green lace to create a cute ribbon closure.
I also made some really cute lace place cards (they match the invitations--to see them click here). 
I wanted to try something new with my traditional limeade, so I added kiwi and used agave nectar to sweeten the drink, and it tasted so good!
I wanted to take pictures of our food, but by the time the food was served I didn't even want to pick up my camera anymore. I was so hungry, haha. I hope you enjoyed my decor and I hope you're having a great Friday!

Card of the Week--Sweet and Simple

Wednesday, November 21, 2012

Lately I've been having fun making single layer cards—with only stamped images, and for this card I wanted to use a new stamp that I just purchased yesterday. I really can’t help buying stamps, they’re my favorite thing to collect, hehe, and all the stamp sets at Joanns were on sale for 50% off! So, even though I wasn't there to buy stamps I just couldn't pass up a great sale. I think I ended up getting two new stamps sets for only $6.00. I was super happy about that. I’m so in love with how this simple card came out—I’m even thinking about selling a set of these as stationary! I know I'd love to get one of these in the mail from a friend.
Just look at all the cute stamps and coordinating sentiments! I was so excited to get these. 
I also found this really cute 'Retro Technology' set, and I can't wait to use it for Valentine's Day merchandise. You know, I can imagine this set working well for other things like an anniversary or graduation too. 
 I think I was sold when I saw this cute stamp, "We're a good mix", LOL. Too cute. I hope you enjoyed this card. I'm so busy right now with orders, Thanksgiving preparations  etc. & I can't wait to share our Thanksgiving dinner photos with you! I just hope I'm not too stuffed to edit pictures that night, hehe. Take care & happy crafting!

How I Made Secret Santa Lists'

Wednesday, November 21, 2012

Every year my family has a Secret Santa gift exchange; and, we always pick names out of a hat after our Thanksgiving dinner. It’s always so excited, hehe. So, yesterday I made our lists’ and we passed them around so they could be filled out and ready to go. This year I made them a little bit bigger than a standard A2 4 x 6 size, and created them at a 5 x 7 size instead—that way we have more room to right down all the things we’d like our secret Santa to get for us.
So, what I did to make 2 sheets was take a piece of cream card stock at 8.5” x 11” and cut it in half at 5 ½”—doing this will give you 2 perfect sheets around 5 x 7 inches. Next I took out my Martha Stewart, CookieAlphabet Set, and used it to create the ‘Secret Santa’ sentiment. At first I wasn't expecting this alphabet set to work out that great because I've been majorly disappointed by Martha S. Alphabet sets before. But, to my surprise they actually work very well. I definitely recommend them (if you’re a stamp lover/collector).
 For the smaller text I used my Lawn Fawn, Harold's ABCs stamp set. They have such great stamps!
I also used my boarder stamps for the dotted lines, and you can see my 'mags&snacks' sentiment--because our Secret Santa puts our favorite magazines and snacks in our stockings every week until Christmas! I love that part. Oh gosh, we're so nerdy. 
Lastly I used one of my Christmas stamp sets to add the date, and used my corner chomper to round the edges of the paper! Isn't it so cute? P.S. I know Wednesday is usually my 'Card of the Week' and I'll still post it either today or tomorrow. Thanks for stopping by! 

Thanksgiving Preparations

Monday, November 19, 2012

Hi everyone! Hope you all had a great weekend! My weekend was kind of bitter sweet because I got to spend the entire weekend with my boyfriend but the night before I was heading over to his house I got a back spasm and I could barely even move—so while I did get to spend lots of quality time with him I mostly unable to even move, LOL—so embarrassing. Moving on, these days are getting so busy and today I wanted to share what’s going on in my house—as far as invitations and decorations go. I also got a few questions as to how I was able to create my Thanksgiving invitations and I wanted to share a quick tip as to how I was able to get all the different fonts sized exactly the way I needed them to.
So, I used my trusty Kraft card stock sheets for the base of the card. I used a standard 8 ½” x 11” sheet and basically just cut it in half length wise at 4 ¼” then cut those two sheets down length wise again at 5 ½” . This gives you four perfectly sized card stock bases at 4 ¼” 5 ½”. Next I used this really cute lace pattern paper from Michaels—it’s my fav! I think the last time I went I bought all of this paper the store had because it was on sale, hehe. Sorry to anyone who wanted some from the store in Hacienda Heights, LOL. So what I did with the lace paper, is cut a few pieces at 4” x 5 ¼”. Doing this leaves a quarter inch boarder. Then I set those aside and went to my computer to create the invitation information.
 I mentioned in another blog post that the theme of this year’s Thanksgiving dinner is ‘lace’ and that the other colors I wanted to incorporate were going to be light greens and light oranges—so I jumped onto Etsy to buy some paper straws. I know that I’m using these for drinks, but I want to use them for other things as well—so we’ll send what I end up doing with them.
 I also purchased some glassine treat bags; and, again I’m not sure what I’m going to do with these—but it’s always nice to have them on hand, hehe.
 ...I thought about using the glassine bags as envelopes. What do you think? They look super cute right? Next I want to quickly share the tool I used to adjust all the font sizes: 
I always like using different fonts when making some quick and easy invitations, and at times I get emails asking how I go about getting the fonts perfectly sized, and I basically just use the lasso tool. I select it, right click on the section I want to adjust, and drag it either up, down, left, or right. Once I'm satisfied with how it all looks I just copy paste that entire image onto a 8.5" x 11" new sheet of paper and print that out (so I get 4 invitations per sheet). Well, I hope this helped, and I'm so looking forward to sharing everything else we're doing for Thanksgiving this year! I think this will be my first time sharing Thanksgiving preparations and it's so much fun sharing these ideas with you all! 
Proudly designed by | mlekoshiPlayground |