Creating Patterns using Homemade Stamps

Wednesday, January 30, 2013

I've been having tons of fun carving my own stamps. This time around I wanted to create a stamp that I could use to create awesome patterns. For this stamp, all I did was take a 4 x4 piece of card stock, fold it in half twice, and cut out a few pieces—the same way you would make a snow flake, basically. Next I transferred that image onto the rubber directly and started carving away. (To view my 'How to carve rubber stamps' click here). 
I pulled out some of my Kraft wrapping paper that I purchased from my local dollar store to test the stamp on, and it came turned out wonderful. 
Ever since I bought my first piece of carving rubber I’ve been thinking about different types of designs I can make. I’d definitely like to start selling these stamps in my shop in the near future—once I feel like I’ve perfected the carving technique and I have a good amount of designs that I like, I’ll start offering them in my shop. Yay! Let me know what you think about this particular pattern :-)

My new hand carved stamp

Sunday, January 27, 2013

I’ve fallen in love with carving my own stamps; and, this weekend I wanted to turn another one of my very own drawings in an image transfer. As you can see from the image above I’ve decided to use my rainy cloud drawing. There are many different types of rainy cloud stamps in the crafty world but I do take pleasure in knowing that my stamps are made out of my own hand drawings—I think that’s why I’ve fallen in love with this technique. 
After I tested out the stamp a few times, I thought they rain drops would look super cute colored in with pastel shades—and I was right! It looked adorable, hehe. 
Once I got the color combo that I liked, I decided to make a card using my new stamp and this is how it came out. I love it so much; and, I’m even thinking about selling these as greeting cards in my shop. 
I also wanted to share how this stamp can be used with other stamps; for instance, I used a baby shower stamp set by, Cloud 9 Design, to create a cute baby shower invitation. It works perfectly for the rainy day baby shower theme doesn't it? 
Well that’s about it for today. Let me know what you think, I love to read your thoughts and comments!

Party Planning—Toy Story

Friday, January 25, 2013

I’m planning a Toy Story themed birthday party for an adorable little girl named, Bella. She’s turning 3, and I’m super excited to be working on this! The main theme of this party is the Cowgirl character, Jessie—therefore, the main colors and patterns are: Cow print, red bandana, denim, clouds, flowers, and so on, but right now, I’m still working on all my samples and coming up with ideas. While this party will mainly focus on, Jessie, I’d still like to have hints of all the other characters throughout the party decor. So, check out what I’ve got so far, and let me know what you think.
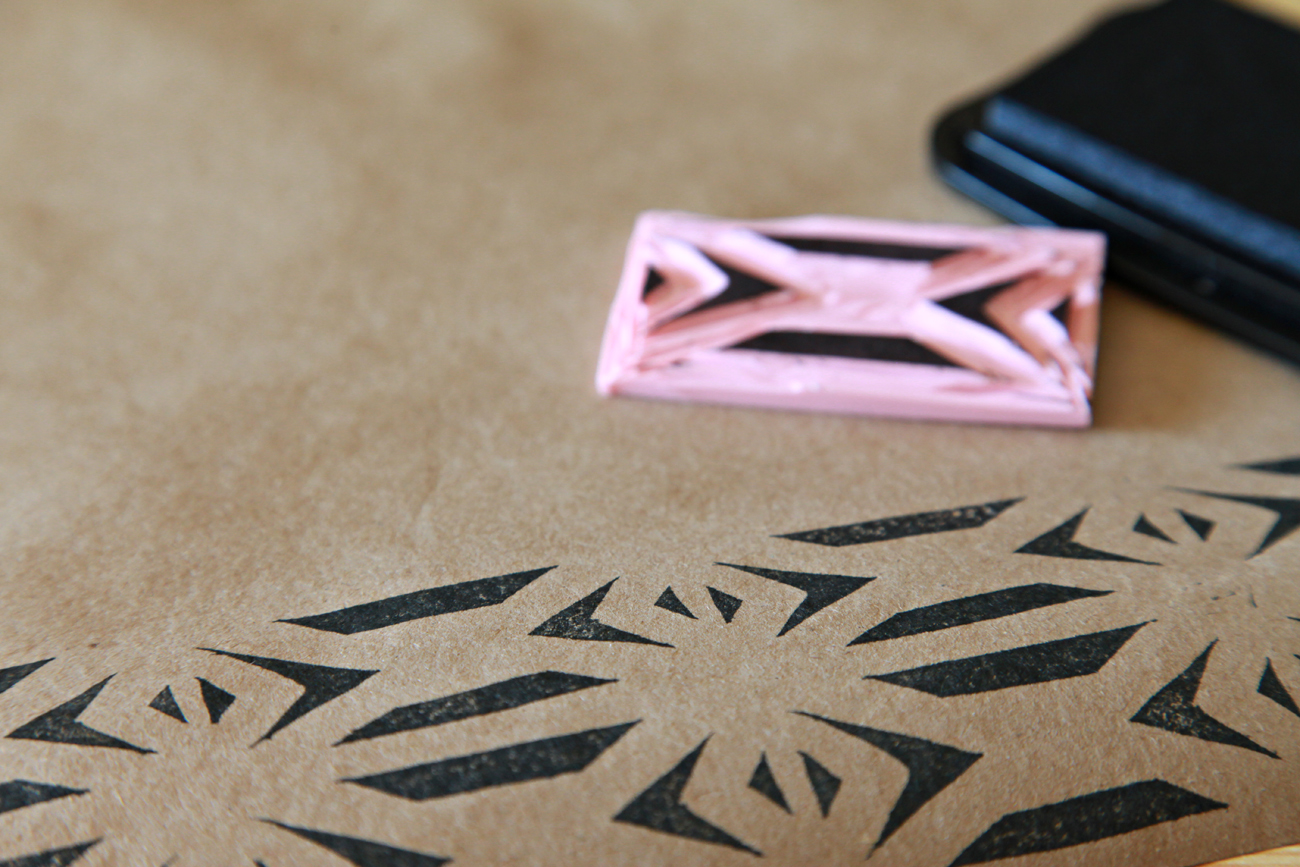
I went the first place I always go to when I’m party planning; and, that’s, Etsy! I found a shop that sells digital download paper, and this shop had awesome Jessie, themed paper. So I purchased it, so that I could make the design for the party bags, candy labels, and tags. You can click here for the papers. All, I did for this bag was combine a few of the digital papers using Photoshop CS5 and had them printed at Office Depot.
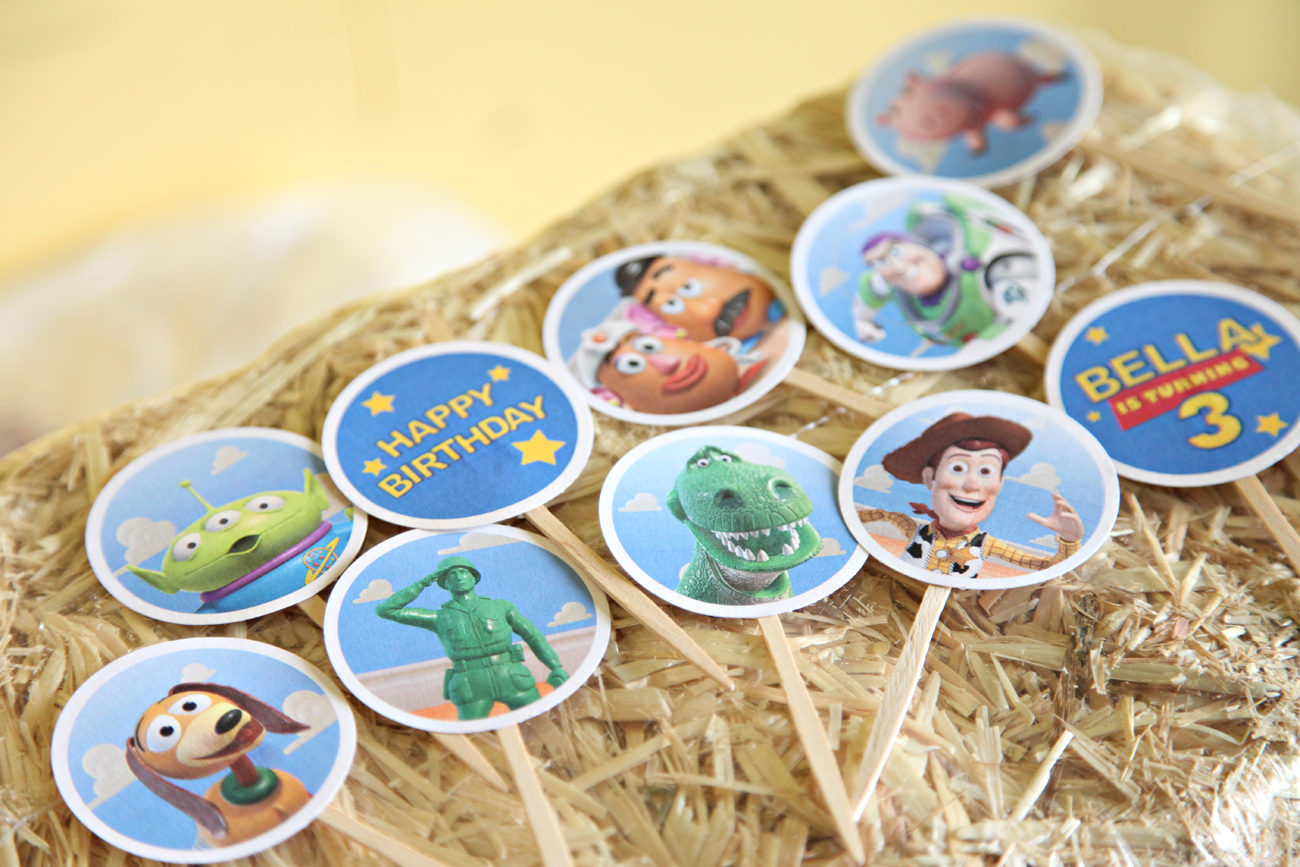
Next, I went to another Etsy shop, (Click here for the shop) and I found this super adorable custom cupcake toppers download. Click here for this download (at a great price too!). I’m going to be using these for cupcakes, box labels, and more.
I've seen this moving box idea around google, and I wanted to do something like this for the party but I wanted to make it slightly different, so it wouldn't look like I completely copied someone else’s design. So I’m using the labels I've downloaded on the front, writing on the sides, marshmallows on the inside—to resemble packing peanuts, and they’re going to be filled with home baked sugar cookies. I've purchased a couple of themed cookie cutters, and when they arrive in the mail I’ll show them to you! 

Johanna, Bella’s mom, mentioned that she wanted a photo booth with themed photo booth props, so I did a quick google search to find some downloads, and I came across this website, that has a free PDF download. The only requirement to downloading these is you have to like her FB page, or follow her blog. I was happy to do so, because this work is amazing!
Here is a drawing of my candy table/cake table idea. I’m only showing a part of it, as a sneak peek—only Bella’s parents and I will know the full details, hehe. I have to keep some of these things secret for the complete reveal right? Haha. 
Lastly, hay bales! I have a super, super cute idea for these, and I can’t wait to show you! These are 20” hay bales that I bought at, Michaels, for only $2.00 dollars each!! Score right? I’d been searching everywhere for this size at a reasonable price—but it was hopeless—until I stopped in at a Michaels, in Santa Monica, CA, and found these on clearance. Once I learned the price I bought them all, hehe. The regular retail price for these 20” hay bales is $12.99 and up—so I was happy.  That’s about it for now, but I’ll definitely keep you posted on most of the details along the way. 

How to Carve Your Own Stamps

Wednesday, January 23, 2013

I absolutely love collecting stamps but lately I've been feeling like I’d like to try creating my very own one of-a-kind stamps. A few years ago, my sister bought me a stamp carving kit and I've just had it sitting in my closet—so I pulled it out, and used some of my own drawings to carve a few stamps.

Here’s what I used:
-Tracing paper
-Pencil
-Ink
-Paper
First, I flipped through my sketch book and found the two drawings I wanted to turn into stamps. Next, I cut out a piece of tracing paper, placed it over my hand drawn image and traced it using a pencil.
Next, I placed that traced image over a piece of rubber, with the penciled image facing down, and rubbed it onto the rubber using the soft tip of the carving tool.
Once the image was transferred I cut it out (so I didn't have to maneuver a huge piece of rubber while carving); and, I began to carve. I started out with the thinner tip—in order to carve the image with precision. Then I used the large carving tip to remove the rest.
Once I had removed the access, I tested it out onto a piece of card stock, and removed any remaining pieces that I didn’t need. When I was happy with the finished results I used my new stamp on a piece of card stock that I folded into a A2 size card, and used my pink (RV11) Copic marker to color in the rest. I’m so happy with how it turned out, and I can’t wait to start stamping in different colors!

Heart Shaped Ice Cubes

Friday, January 18, 2013

Back in December I went shopping for my little sisters Christmas gift, and while I was waiting in line I noticed all the bins filled with things that stores are hoping we’ll buy last minute, haha, and I saw this super cute heart shaped ice-cube tray—and had to have it. I thought this would be so cute for Valentine’s Day and for my blog as well. I have to tell you though, my original idea was to make the ice cubes red by using frozen strawberries and lemon juice—so it would be a natural and healthy recipe—but my local market didn't have any frozen strawberries! I was so sad, but I didn't want to skip this tutorial; so, I decided to use water and food coloring instead. Food coloring is in many of our foods that we eat, but keep in mind that some people have allergies when it comes to food coloring. So I think the safest way to go would be using a mixture of frozen strawberries and lemon juice—you can simply blend those ingredients and pour them into the tray (that would probably taste better, too). Luckily, I’m not allergic to food coloring so I’m going to give it a go.
So, first you’ll need this super cute ice cube tray; and, you can find this at Forever21 or at Ikea. Next, you’ll need a cup of water (or lemon juice) and place a couple drops of the food coloring into the cup of water and mix. After you've done that, you can pour this mixture into the tray, place it into the freezer, and leave it in there until they’re frozen.


When I pulled them out of the freezer I added them to a glass of lemonade and they looked so cute! I think I’ll definitely experiment with different ways to make red ice cubes--like the lemon and strawberry mixture I mentioned. 

Unify Photo Shoot—behind the scenes

Monday, January 14, 2013

Hi everyone! It’s Monday once again and today I’d love to share a behind the scenes look at how I go about prepping for a photo shoot. I always strive to take beautiful pictures of new items I've created for my shop; namely, because great item pictures are like first impressions when it comes to selling on the web. This year one of my goals is to always take great pictures for my shop and I’d like to show you how I make my settings looks like a million bucks but at cost of someone on a budget—like myself.
Firstly, I’m doing this whole photo shoot for new wedding theme cupcake toppers I made. So I needed cupcakes; and, I really enjoy making them myself. It always feels wrong to go to the market buy a cupcake, stick one of my cupcake toppers in it, and claim it as my own—I’m just weird that way. I tried it once and just threw it away because you could kind of tell I didn't make it, haha. So for this session I just went over to my local dollar store and bought a box cake mix—which is PERFECT because it only makes 12. Next I used a piping bag, and jumbo piping tips—you can find some here.
Next I referred to my trust icing color chart and choose the color: Rose water. It’s so pretty and sweet. The icing color chart can be found inside the awesome pages of the Food Network Magazine, 2012 May issue, Volume 5, Number 4. You can download the issue by clicking here (not too sure if it’s free).
Next I added some pretty pearls and the cupcakes were ready for their close up! 
The behind the scenes star of this shoot was going to be these awesome lights I purchased from Walmart. I was so obsessed, this year, with taking pictures of things in front of my Christmas tree—because of the blurred light effect—so I thought I’d try to recreate that effect for this shoot. You can find them at Walmart, in the wedding section for under $6.00.
After I set up the lights were I wanted them, I grabbed any ol’ mini table I could find and I placed a piece of 12 x 12 pattern paper over it to cover the unwanted design. 
I placed that mini table a few feet away from the lights in order to create more depth of field. Once the cupcake toppers were inserted I was ready to shoot and here are the results!
What do you think? I also used natural lighting because I don’t have a flash (nor do I like using it) but when I noticed I was starting to get some shadow I simply fixed that by placing a white board near the side of the cupcakes that were producing an ugly shadow. It worked out ok :-p
I was pretty happy with the over results. It was super fun for me and it was super easy on my wallet. I love that taking pretty pictures doesn't have to cost much. Have a great day!
Proudly designed by | mlekoshiPlayground |