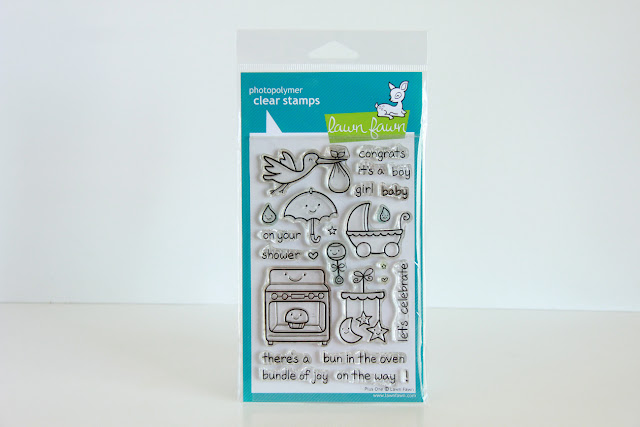
Hello again! I'm happy to start a new series of posts' here on my blog. It's my first series and I'm naming it 'How it's Made'. I usually have D.I.Y. posts' and that's all find and dandy-- but sometimes I wonder if anyone ever wants to know how I make the products I offer on my page. The item I'm going to showcase in my first 'How it's made' series is a set of tags I just created this weekend. They're new, and they'll be added to my Etsy page in due time--but enough talk, let's get this show on the road!
The tools I use for this project are as follows:
-Plus One stamp set by Lawn Fawn
-Harold's ABCs stamp set by Lawn Fawn
-Heart shape stamp (small)
-Cut tags
-Markers
-Black Ink
-Red Chalk Ink
-Bakers Twine
Before I upload a flood of images, let me just say that I've recently stumbled upon the Lawn Fawn website through Google; and I'm so happy that I did! They have the cutest stamps I've ever laid eyes on. Their stamps have completely renewed my love for papercrafting. You can find them here.
Now, let's begin!
Here are pictures of the cute stamp sets--you can see for yourself how adorable they are.
What I did first was cut out some tags with my Cricut. Then used the 'bun in the
oven' stamp from the Plus One stamp collection, and stamped my image on the 2
inch tag. Next I used the Harold's ABCs set to create the sweet sentiment,
'Baked with' and then used a heart stamp for the "love"; and I stamped the heart
in red ink for a bit of contrast.
Next I used my Prismacolor Art markers to color in the image. I've found that most crafters prefer the use of Copic markers but let's face it, they're ultra expensive and I have to use the only tools that are available to me. This is sorta off topic but I've had these markers for 10+ years and I've never even had a purpose for them until I started buying Lawn Fawn stamps. I'm so happy that I finally have a reason to use them now!
Once I've completed coloring in the image I simply attached the bakers twine and then I'm finished!
Here is the finished product:
Thanks again for stopping by, and I look forward to more 'How it's Made' by Unify! Till next time my friends.


They're adorable! And I'm a Prismacolor fan, too. I briefly worked for the company that made them, so I'm probably biased, but I think they work really well. :-)
ReplyDeleteI think they work really well too! At first I didn't think they would be that great--but they are. :-D Thanks for the kind words!
DeleteAwesome looking tags! Thanks for the DIY!
ReplyDeleteThanks for the kind words Alessandra!
DeleteAww, these are absolutely wonderful! I loved reading about how they are made! Thank you :)
ReplyDeleteNo problem! I love sharing :)
DeleteThose are so cute!
ReplyDelete:-D Thanks Vanessa!
DeleteOooh, I've just popped over to your blog from Anastasia Drawing and Dreaming. Cute as a button blog. Yay you.
ReplyDeleteWelcome to my blog! & thank you :-p
DeleteAh that's too cute!
ReplyDeleteI think I might have to get some of those!
Hmm... I wonder if my landlord would like it if I decorated the walls with them ;D haha
Thank you! :-D
DeleteOh my goodness those are just so adorable! :) eeeeep so cute! love your blog!
ReplyDeleteThank you for the kind words!! =D
ReplyDelete