Showing posts with label make it yourself. Show all posts

Card of the Week #3

Wednesday, August 8, 2012

It may seem crazy, that I’m starting on my new 2012 Christmas line of cards, tags, and more. But, lately I’ve been thinking about what cards I want to have for sale in my shop; and, I don’t want to wait until the last minute. For some reason Christmas cards are a little more challenging for me than baby shower cards, invitations, and Birthday cards; so,  I figured designing Christmas cards early this year would save me tons of stress. I tried my best to get super creative with this card and I think I did well in capturing the beauty and warmth of my favorite holiday. 
Here are the materials I used for this card: Cream card stock base, Kraft card stock frame, Recollections New Christmas paper stack, ribbon, Lawn Fawn stamps, Inkadinkado Christmas stamps, Black ink, red chalk ink, and my new crafty toy: my gelly pen! 
I took a close up shot of the faux stitching I used on the card with my new gelly pen. I’ve seen lots of papercrafters use this particular pen and I wanted to give it a try. So far, I'm happy with the results. 

Thank you for visiting today for another ‘Card of the Week’ post. Let me know your thoughts on this design. I’d love to hear from you!

xoxo

How It's Made--Baked With Love Tags Series # 1

Monday, July 2, 2012


Hello again! I'm happy to start a new series of posts' here on my blog. It's my first series and I'm naming it 'How it's Made'. I usually have D.I.Y. posts' and that's all find and dandy-- but sometimes I wonder if anyone ever wants to know how I make the products I offer on my page. The item I'm going to showcase in my first 'How it's made' series is a set of tags I just created this weekend. They're new, and they'll be added to my Etsy page in due time--but enough talk, let's get this show on the road!


The tools I use for this project are as follows:

-Plus One stamp set by Lawn Fawn

-Harold's ABCs stamp set by Lawn Fawn

-Heart shape stamp (small)

-Cut tags

-Markers

-Black Ink

-Red Chalk Ink

-Bakers Twine


Before I upload a flood of images, let me just say that I've recently stumbled upon the Lawn Fawn website through Google; and I'm so happy that I did! They have the cutest stamps I've ever laid eyes on. Their stamps have completely renewed my love for papercrafting. You can find them here.

Now, let's begin!

Here are pictures of the cute stamp sets--you can see for yourself how adorable they are.


What I did first was cut out some tags with my Cricut. Then used the 'bun in the oven' stamp from the Plus One stamp collection, and stamped my image on the 2 inch tag. Next I used the Harold's ABCs set to create the sweet sentiment, 'Baked with' and then used a heart stamp for the "love"; and I stamped the heart in red ink for a bit of contrast.


Next I used my Prismacolor Art markers to color in the image. I've found that most crafters prefer the use of Copic markers but let's face it, they're ultra expensive and I have to use the only tools that are available to me. This is sorta off topic but I've had these markers for 10+ years and I've never even had a purpose for them until I started buying Lawn Fawn stamps. I'm so happy that I finally have a reason to use them now!


Once I've completed coloring in the image I simply attached the bakers twine and then I'm finished!


Here is the finished product:


Thanks again for stopping by, and I look forward to more 'How it's Made' by Unify! Till next time my friends.

My Blue Valentine Edible Cupcake Topper Tutorial

Saturday, January 21, 2012

When it comes to Valentine’s Day many individuals like to make their special someone something from the heart—something they can make with their own hands. Baking is one of the best ways to express our love, and I have a fun, easy, and affordable way for you to spread some love around.
What you’ll need:
1.       Mini Crockpot or double boiler.
2.       1 bag of candy melts
3.       Glue
4.       A ceramic cup with a spout
5.       Squeeze bottle
6.       Wax paper or parchment paper
7.       Heart cut-outs and scrap paper
8.       Tray
9.       Iced cupcakes
Step 1: Glue your heart cut-outs onto your scrap piece of paper, leaving enough space in between each heart.
Here is an example of what it should look like:
Next, place your paper with the glued hearts onto your tray, and then place a piece of wax paper over hearts and set aside.
Melt your candy melts over a double boiler (instructions for double boiler is on the back of the candy melts package), or in your mini Crockpot. Once the candy is completely melted pour it into your ceramic cup. Tip: What I like to do is place my ceramic cup into the microwave for a minute or two—bringing the cup to room temperature.
From this point, transfer the melted candy into your squeeze bottle.

Now you can begin to trace the hearts on the wax paper using the template you made.
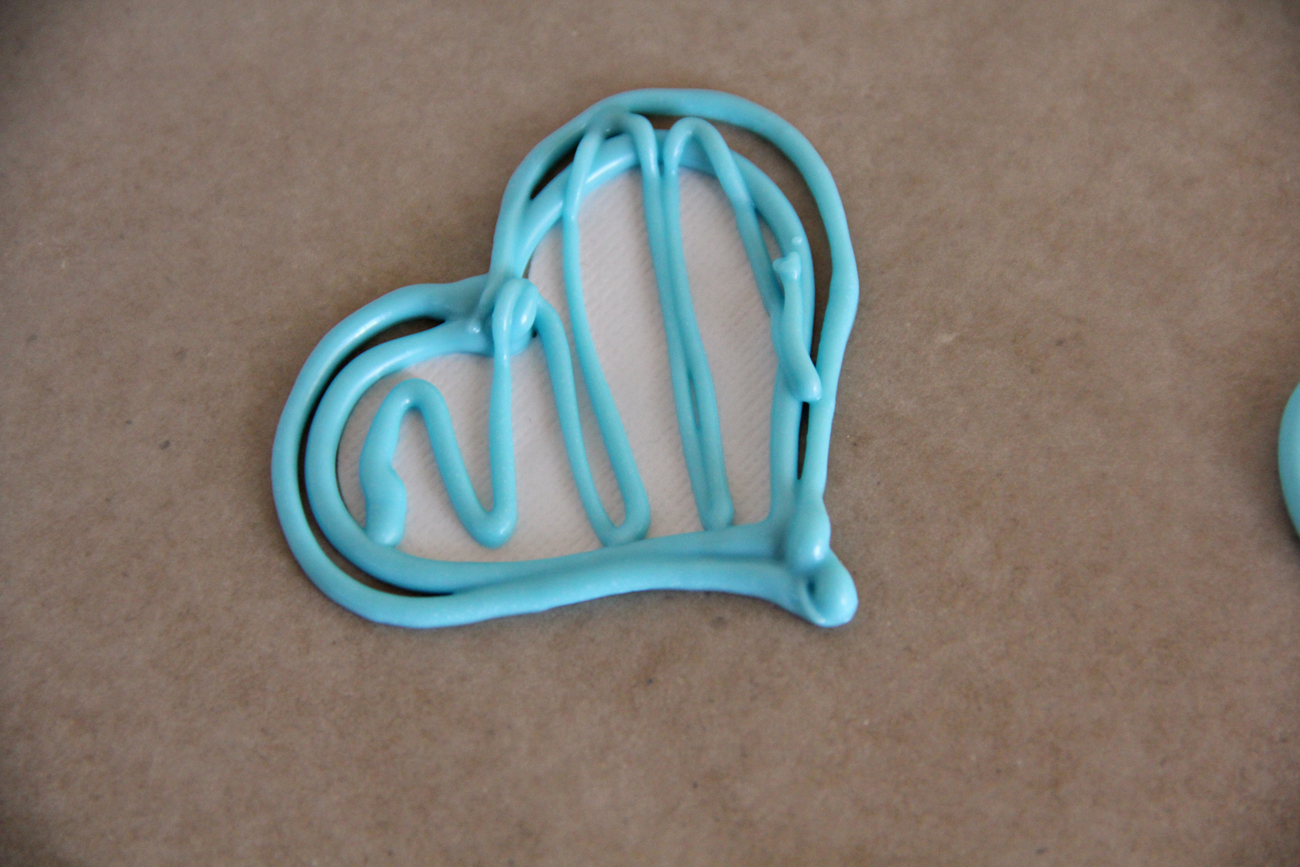
Front this point you can leave it the way it is, or you can fill in the heart with a creative design like so:
Once all your hearts have been drawn let them set for 15 minutes at room temperature. Once they have hardened you can gently remove them with a spatula, and then decorate your cupcakes! Here are two ways to lay your edible cupcake toppers.
I ended up having a little bit left over so I had fun with free hand designs in the end and this is what I came up with!
I hope you enjoyed this tutorial/idea. I certainly had a lot of fun making them and sharing them with my friends and family. Also, don’t let the fun end here. Think of ways you can use this idea for other holidays or even birthdays!
Till next time ;)

Proudly designed by | mlekoshiPlayground |