New Lawn Fawn

Wednesday, May 21, 2014

Words cannot describe how happy the new Lawn Fawn summer release makes me. I've been lucky enough to get my hands on the collection early and when I received my package in the mail I was so excited because I had no clue what the new collection looked like. As I was going through the sets and dies one by one, I was gasping at everything I was looking at--it was so funny now that I think about it. I'm like a huge stamp nerd. It's funny how Lawn Fawn stamps can truly make my day. Their stamps are so happy that it's impossible for their cute happiness not to rub off on my mood. When I'm having a bad day or I'd simply like to calm down from a hectic day I always love making a card with their stamps. It makes everything all better for me, hehe. 
I'm so excited for the next Lawn Fawn video I'll be making for next month. I hope you all love it! I also wanted to say that I've still been trying to make a card everyday for my 'card a day' series BUT I can't share a lot of them right now because I'm making them with the new collection and some of them haven't been shown yet. So I'm thinking of showing all my new cards once the summer collection is fully released. I can't wait! 

Thank you for stopping by and I hope you like my card. How are you loving the collection so far? Isn't everything a MUST HAVE?! I love it all. Take care! 

Handmade Stationary Set, A perfect Mother's Day gift

Thursday, May 8, 2014

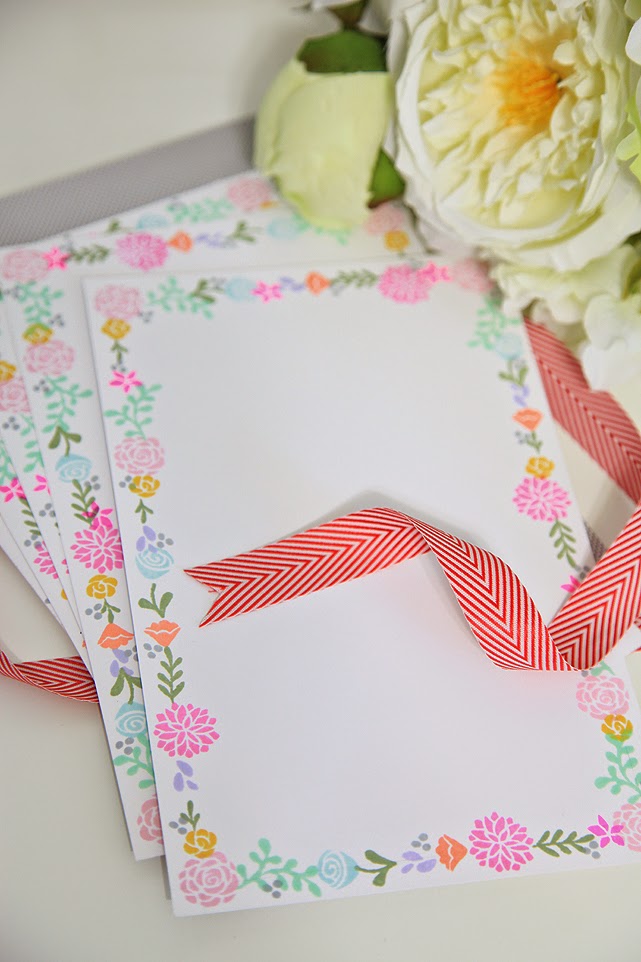
Today I have really quick & easy tutorial for you! I made a video for the Lawn Fawn blog on how to make handmade stationary using the LF stamp set, Penelope's Blossoms. Scroll down to watch the video! 


I hope you enjoyed this video! I wasn't able to post this past Monday, and Wednesday but I'm going to post tomorrow for 'One card a Week', so stay tuned. 

One Card A Day, New Series

Friday, May 2, 2014

In my last post I mentioned that I had a new goal of making at least one card a day; and, this week was the first time I actually give it a try. I made a card on Monday, Tuesday, and Thursday. With fulfilling orders it sometimes gets really hard to make a card each day because my business/buyers are my first priority. When I did have time to make a card it was more like I stayed up an hour later after work to make my card. Some nights I just couldn't stay up past midnight to make a card, though, hehe.
I recently purchased a few new stamp sets and dies—some from Mama Elephant and a few others from Avery Elle. I have a feeling that this new series ‘One card a Day’ is going to empty my wallet very fast, lol, because I’m going to need lots of new stamp sets. I mean I have a lot to begin with, but we card makers/crafters always need an excuse to buy more stamps—am I right?
For these cards, I use a lot of fun techniques like watercoloring, Copic coloring, and paper piecing. I also used Lawn Fawn paper, stamps and dies too. I actually had a lot of fun mixing and matching products from lots of different stamp manufactures. I usually make a card using only one stamp company but mixing them all together made the creating process so much fun!
Well, I hope you enjoyed this new series and I can’t wait to try it again next week. Hopefully I’ll get a chance to make one every day. I think I’m going to try and make a card tonight too, and if I do I’ll share them next Friday for ‘One card a day, #2. 

Make your own Dino cake using Stamps, with Video

Tuesday, April 29, 2014

I'm happy to be sharing how I made this adorable Dino cake using Lawn Fawn stamps, dies, and twine. You can view the video below for the details!! I hope you enjoy it! 

I hope you loved this idea! I think that lots of Lawn Fawn stamps would be perfect for creating cute scenes on top of cakes! Give it a try! 

Crafty Weekend Fun

Monday, April 28, 2014

If you follow me on Instagram (@unifyhandmade) you may have already seen two of the cards I’m showing here on my blog today. I made these cards for fun, and I like having lots of them on hand and ready to go for myself and for my family and friends as well. The last stash I had collected was running very low, and lately I’ve been trying to make at least one card a day—for fun, to keep my stash alive, hehe. I think making one card a day is an easy goal—and it’ll certainly be a fun one. It seems as though I’ve haven’t been making as many cards as I used to these past couple of months. But now I’d like to ensure I put time aside to create at least one card a day. I think I’ve said this in the past a few times, but this time around I’m really going to make time for all of my stamps, dies, and other craft tools. I can’t let them just sit there collecting dust. They’re all too cute and fun not to use!
I do get my crafty fix when I’m working all day on the papercrafts I sell in my shop—and that’s such a blessing it itself. Maybe that’s why I didn’t even realize that I wasn’t making enough cards for fun because I have fun everyday just working on orders, too. Once in a while when I’m working I’ll glance over at my stamp stash and realize they’re being neglected but I always tell myself, “Oh the weekend, I’ll make as many cards for fun as I can” or, “I’ll make one card tonight before bed”. Usually I’ll post a light night card on my Instagram, hehe.
This weekend I also went to Lawn Fawn’s 4th birthday party at, Stamp Fever, in Orange, CA. It’s a cute little craft shop filled with all the things to fulfil your crafting needs—plus the staff there is super nice! If they don’t have something you need, they’ll simply order it for you. Kelly Marie, and Mike, (two out of the three LF owners) were there greeting everyone, and doing fun make-n-takes. It was really fun to be in a fun crafty environment with friends. I even took my boyfriend, Gabriel, and I made him do a make-n-take with, Nancy, hehe.
While I was at Stamp Fever I picked up a few new stamp sets, and dies. I’ll probably be sharing those on my blog soon. I love supporting small business so I tried to spend as much as I could without going overboard at Stamp Fever—actually I think I did go a little overboard but it’s ok! Haha.
Tomorrow I have a new video on the Lawn Fawn blog so I hope you stop by their page to view it. I’ll probably share it here on my blog as well.


I hope you have a great day! 

Watercoloring with Distress Ink

Monday, April 21, 2014

I made a card over the weekend using this fun watercoloring with distress ink technique; and, I had a few questions on Instagram as to how I created the background so I thought it would be fun to create a quick tutorial. This is a technique I learned from watching Kristina Werner’s Youtube videos. I love watching her videos because I get to see all the new products and even learn a few tips and tricks along the way. I’d definitely recommend subscribing to her channel—it’s so fun! Click here for her Youtube Channel.


What I’m using (I purchased all of these items at Joanns & Michaels but you can also find them online:

-Distress Watercolor Cardstock
-Mini Mister
-Worn Lipstick Distress Ink
-Picked Raspberry Distress Ink
-Wild Honey Distress Ink
-The back of a shipping label (most crafters use the craft mat but wax paper would also work, too)

What I love about this distress watercolor cardstock is that it’s already at an A2 size, so I don’t have to do any cutting and measuring—it’s just ready to go. Not only that, there are also two textured sides to this cardstock. One side is smooth and the other is like a traditionally textured watercoloring paper. This card is thick and while it does warp when wet—it also flattens again once it’s dry. Yay!


Step 1: I’m using the back of a shipping label for this project, Kristina uses the craft mat (you can purchase online or at Michaels) but you can also use wax paper. You basically need something slick that won’t absorb the water or ink. So, after placing the backing of a shipping label onto my work surface I grabbed the distress ink colors I wanted to use for this card. I’m using: Worn lipstick, picked raspberry, and wild honey. Next, I removed the cap of the ink pad and apply ink to the slick surface, and repeated that with each color. 
Step 2: Once I have all of my colors smudged on the slick surface I misted the ink with water, using my mini mister. Adding water is the fun part for me, haha.
Step 3: Simply take your watercolor cardstock and smear it onto the ink and water mixture.
Step 4: Once you lift it you’ll notice a pool of ink at the bottom of the paper—simply dab that onto a piece of paper towel and set it aside to dry. It’s so simple! I love this technique.
Once it’s dry you can simply adhere it to your A2 size card base and decorate it any way you’d like to. You can use white embossing powder to create a simple card with a sweet sentiment or you can add images to it like I did with my card. The fun possibilities are endless. I hope you enjoyed this mini tutorial and if you have any other tutorials you’d like for me to create feel free to ask! 

Easy Easter Treats, Part 2, Rice Krispies Easter Bunnies

Monday, April 14, 2014

Its Monday once again and now Easter is even closer—but not to worry I have a really easy, yet super tasty treat that you can make for your friends and family for this special holiday (or even just for yourself, hehe). I went to Michaels and found that they have this really cute bunny shaped cookie cutter and it was only $0.99. I thought it would be perfect for creating Easter bunny themed treats.  The pink ribbon used for the bow is also from Michaels—you can find a wide variety of colors to choose from in their ribbon section.
What you’ll need:

Ingredients
3 tbsp. Butter
10oz. Marshmallows
6 cups of Rice Krispies Cereal
Cooking spray
Neon food coloring (optional)

Tools
Rubber spatula
Large bowl
Medium sauce pan
Wax paper
Cookie cutter 
Step 1: First thing is you’ll want to take your cooking spray and spray every single tool you’re going to use because this recipe can get pretty sticky and messy. Apply cooking spray to your sauce pan, bowl, cake sheet pan (or whatever you use), the spatula, cookie cutter, etc.
Step 2: Put your sauce pan on the stove and turn on the heat to low, add the butter and let it melt. Once the butter has melted add all of the marshmallows and stir frequently until they’re completely melted. It’s going to smell so good at this point! Once it’s been melted you can take it off the heat, and add the food coloring—but adding the coloring is completely optional.
 Step 3: Simply add the sauce into the bowl that has been pre-sprayed and mix all of the ingredients together.
Step 4: Add it to your baking dish. I placed wax paper on the bottom of the pan; namely, because I didn’t want a sticky mess on that pan. Then I spread out the mixture, covered it with another piece of wax paper and flattened it with another baking dish to make it evenly flat. Once that has been done, simply set is aside for about 20-30 minutes so it can cool down.
Step 5: Once it’s cool, you can begin cutting out your shapes with the pre-sprayed bunny shaped cookie cutter. I’ve seen man recipes that place the rice krispies in the refrigerator first but if you plan on cutting them with a cookie cutter I’d recommend simply letting them cool at room temperate. Once they’ve been cut, then you can place them in the fridge—if you like. 
 Step 6: Add some cute ribbon and you’re finished! If you’re making them the night before simply place them into an air tight container and place them in the fridge. On the day you plan on serving them take them out of the fridge to let them return to room temperature. Tip: This recipe will only last up to a week in the fridge.

Aren't they adorable?! They tasted so amazing, too. I almost couldn't stop eating the left overs but I HAD to, hehe. I hope you give these bunnies a try Easter. You and all of your loved ones will definitely enjoy them! 
Proudly designed by | mlekoshiPlayground |