How it’s made Monday—My Baby Announcement cards

Monday, August 6, 2012

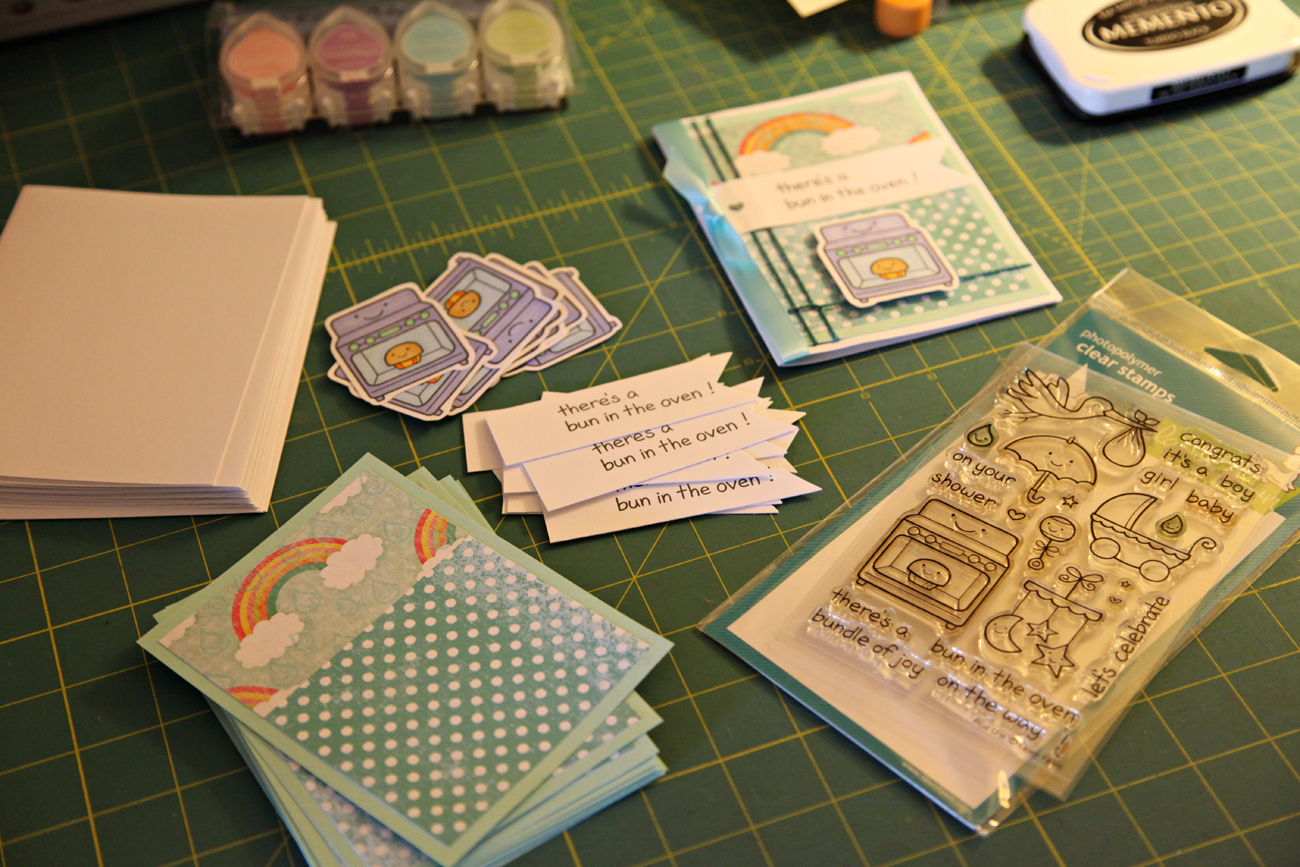
I love showing how I make the items I sell, and today I wanted to take advantage of a recent order I had to make and show a couple of pictures I snapped while working. The card I’ll be showing is my baby announcement card ‘bun in the oven’, using Lawn Fawn stamps.

What I like to do first is prep—I cut and stamp all the pieces I need. Which makes for a quick and easy assembly line. 


I hope you enjoyed watching my process. This is one of my favorite cards to make! 

Foodie Friday

Friday, August 3, 2012

First of all—sorry if the title of this post is cheesy. You’ll forgive me though, when you check out this super tasty recipe created by the awesome Giada De Laurentiis. If you love to cook, like me, then you know who she is. She is the main cook behind Everyday Italian and Giada at Home; and boy can she cook. Her Italian food is so delicious and she makes her recipes simple so that we can create Italian cuisine at home, with ease. I’ve attempted a few of her recipes and by far my favorite is her macaroni and Cheese Recipe; and, I recommend you give it a try.

The directions are super simple—click here to view the ingredients and instructions.
I’m going to show you how I make it, and hopefully offer some tips.

First I grease my 13 x 9 inch baking dish. 
Next, I boil a large pot of water and once it comes up to a rolling boil I add in a hand full of salt and my wide egg noodles. Then remove them once they are tender. 
Then cook up a couple pieces of bacon (I use bacon instead of ham). Next chop the bacon into small bits and chop up your parsley as well—then side aside. 
Next, I get a large bowl and grab the following ingredients: 2 cups cream, 2 ½ milk, 2 tsp. flour, ½ teaspoon salt, and pepper. Toss them into your bowl and whisk. I usually whisk for about 5 minutes because I want the mixture to thicken a bit. 


I also use different cheeses for this recipe but it still tastes so good! I just buy two containers of the three cheese blend, and use 1 ¾ of both containers of cheese combined, and save ¼ of the cheese mix for the top of the macaroni. Once I’ve done that, I add the cheese, bacon, and parsley to the cream mixture and mix. 

Next, add the egg noodles. 
Then add to your baking dish and top with the remainder of your cheese (that’s if you’re making it my way) and place into your oven. Another tip I have is leave the macaroni in the oven until the cream is bubbling and the tops are a little toasty. Then let the macaroni sit out for about 10 minutes. It will come out perfect if you do it that way.

Then when it’s done, serve it up! Nom nom. 
Happy eating! I’m hungry now…

+ Thank you to my lovely sister Angie for assisting me with this macaroni so I wouldn't get my camera dirty :-) 

Card of the week #2

Thursday, August 2, 2012

Hello! I’m back again with my card of the week. I wanted to try something cute and special so I made this mini-greeting card. Well, it’s more of a mini-love note. I made this card using the adorable Lawn Fawn stamps, Kraft paper, and one of my favorite paper stacks! About a year or two ago I found a How-Tuesday video on the Etsy blog, on how to make a cute mini-book, and that’s where I learned how to make this particular flip book—only I decorated it myself instead printing out their template. To learn how to make the mini-book, click here to watch their super cute video.
I had a lot of fun making this mini-card. I always like making really small cards because I think they look so cute. The Lawn Fawn stamps work really well when making tiny cards, as you can see from the images.  


…and, here is the card completely open. This card was made using a standard size card stock: 8” x 11.5”.

Thanks for stopping by! I hope you enjoyed this mini-love note greeting card. 

How it’s Made #2

Tuesday, July 31, 2012

A while back I started my new series named ‘How it’s made’. Where I show everyone how I make certain items I have listed in my shop; and, for this post I wanted to share how I go about creating my multipurpose zipper case.  

Here it is from start to finish!

These are the materials I use for the body of the case: 

The lining…
First I press all the fabric and apply the fusible interfacing. 
Next I sew those pieces to the white felt (This adds more body and padding to the case)

Next I prep the faux leather bottoms…
Then sew them to the pattern fabric, like so:
Next I whip stitch my zipper…

Then sew the zipper to the pattern fabric (zipper facing down)
Next, I sew the lining to the zipper and pattern fabric with right sides facing together…
Then repeat on the other side:
Next I edge stitch…
Next, I place the lining pieces together with right sides facing, and do the same with the outer pattern fabric and sew all the way around—making sure I back stitch for the opening on the bottom where I’ll turn the case inside out. 

Once it’s sewn all the way around I open the bottom with my seam ripper and flip the case inside out:


Next I sew the opening, and the case is finish. Then I add the finishing touching with the rings and tassel…

…and there you have it! My case from start to finish.  
Proudly designed by | mlekoshiPlayground |