Showing posts with label papercrafting for christmas. Show all posts

Hanging Boxes on the Christmas Tree--DIY

Tuesday, December 16, 2014

It’s always a little hard trying to find the cutest way to put a gift card under the Christmas tree but this quick and easy DIY will help remedy that minor issue. Lawn Fawn has the most adorable little goodie bag die (you can find it by clicking here), and aside from using it as a treat box you can also use it a gift card holder and even hang it from your Christmas tree. Problem solved!

If you’re already a papercrafter all you’ll need is this die (if you don’t already have it), some pattern paper, and this twine. You can create your own tag with any dies you’d like however, if you wanted to know which die and stamps I’m using to create this tag you can click, here, here, here and here.

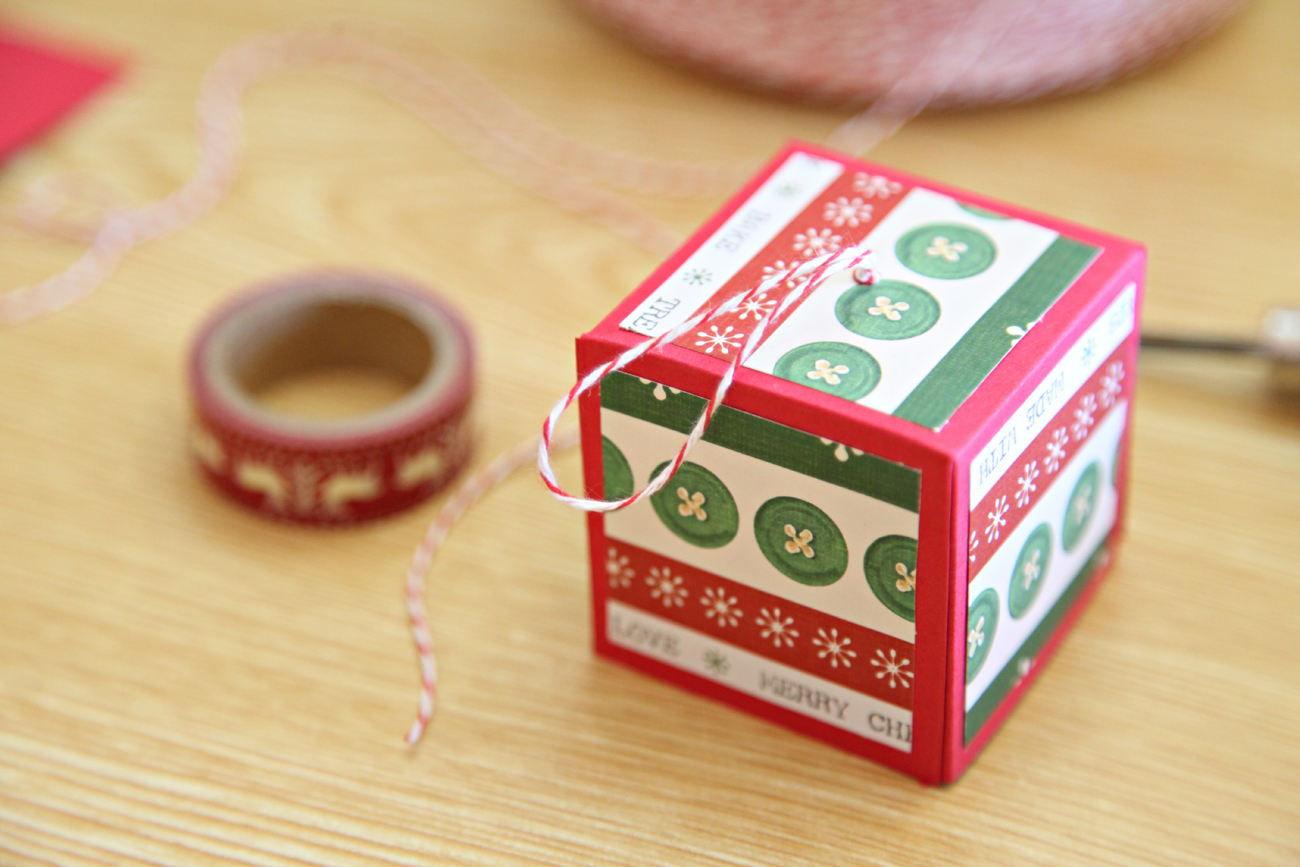
All I did was cut two of the box die cuts using my Cuttlebug and assembled it using some adhesive. Next I created the tag with the stamps and die mentioned above. Next I took some twine and simply wrapped it around the box a few times to keep it sealed nicely and then tied a knot at the end of the remaining twine—just like you would with a tag.

Quick, simple, and super adorable! 

Lawn Fawn and Imagine Crafts Week

Tuesday, November 4, 2014

Lawn Fawn and Imagine Crafts are teaming up for a week full of inky inspiration! Imagine Crafts was kind enough to send use gals some ink pads and we’re using the new Lawn Fawn stamps to create some fun projects. I created a card using: Radiant Neon in Electric Green, Memento Luxe in Northern pine, Memento Luxe in Love Letter, Delicata in Golden Glitz, and Delicata in Silvery Shimmer.

The Neon Electric Green ink pad is so awesome! I used it for the pine tree images when creating a border around my die cut panel. I love how this color looks and I feel like it’s a bright and fun color to use along with this “Merry and Bright” sentiment from the, Snow Day, stamp set. After stamping the border I took the memento luxe love letter ink and stamped the little berries and also stamped the trio of leaves using the memento luxe northern pine ink. In the image it looks like it’s black but in person it’s got this great dark green look to it—it’s great! I also stamped the Christmas tree in that ink as well. I used the awesome Delicata inks to add a little shimmer and glimmer—with the golden glitz and silvery shimmer pads, too.

Using these inks to create awesome cards is a great alternative to using Copic markers. Not only that but using a variety of ink pads to create cards is a great way to save time and still keep those pops of color on each card. This card didn’t take my too long to make and if you notice it’s also a single layer panel. For a little bit of added interested I simply propped up the panel on some 3D foam adhesive and matched it up with the, Long Johns, Lawn Fawn paper. The Neon Electric Green and this sheet of pattern paper by LF go hand in hand. What’s great about this paper is it’s also on sale by the sheet—so if you like the look of my card you could make many of them! 

Lawn Fawn Inspiration Week--Scripty Joy and Winter Penguin

Monday, October 20, 2014

I'm so excited to be sharing my creations using the new, Scripty Joy die, and the Winter Penguin mini stamp set. I can't say enough how adorable the winter penguin set is! It's a small yet super affordable set, and you can also purchase the coordinating die. I loved working with the, scripty joy, die and I used it on the card shown above with the Violet's ABCs alphabet stamp set to create the sentiment, "Joy to the world". Since it's a well known song I thought it would be fitting to use the music sheet paper from the new Snow Day collection. I love that sheet paper so much! When creating the "Happy Holidays" penguin card I wanted to make it look like she was skating in over a frozen lake so I used the forest boarder die along with the stitched hillside boarder dies to achieve that look. I also used the trees from the, Snow Day, stamp set and stamped them in a few different colors for some added interest. To tie these cards together I also used some of the metallic gold sequins from Pretty Pink Posh. I hope you love them!

To view the other cards created the Lawn Fawn design team click, here. When you get to the blog you'll also get a chance to win a stamp of your own!

My Plans for a DIY Paper Ornament Christmas

Monday, December 10, 2012

I love Monday’s because it means I’ve got so much crafting to do. On Monday’s I’m usually finishing up orders that I’ve received over the weekend, working on my blog, shipping packages, planning for future blog posts’, and work more orders again, hehe. This year I’m planning to make about 80% of the ornaments on the Christmas tree; and, I’m excited to be getting my family involved with this process. So over the weekend I was doing research on the internet trying to find out how to make paper rosettes and other types of paper ornaments that I’d like to use. There are a few types of paper ornaments that I already knew how to make but I wanted to learn how to make a wide variety of them so that I don’t have the same two types of ornaments all over the tree, haha. As of now I’m gathering my ideas, and testing them all out. Once I’m sure of all the ornaments I’m going to want on the tree I’ll start the little papercraft party with my sisters—that’ll be so much fun! I’m sure wine will be involved.
My first paper rosette! ^^ + Below I'd like to share how I went about making the mini paper boxes. They're so cute and I hope you give them a try :-p
For the box you'll need your favorite piece of pattern paper, two 6"x6" pieces of card stock (any color), a score board, and a scoring tool. 
Take the two pieces of 6x6 card stock and make your score marks at 2" and 4", next rotate and repeat. 
 Next, cut like so; and, fold the score marks with your finger or bone folder. 
Next, cut 5 pieces of pattern paper at 1 ¾” by 1 ¾” and adhere them as show in the picture below. 
Next make a small hole in the center of the box, tie some twine with a large knot and slip through the hole, and secure with a piece of tape. 
 Now you can assemble the box like so:
 ...and repeat those steps for the bottom of the box (minus the pattern paper). 
There you have it! Isn't it cute? I can't wait to figure out all the ornaments I'm going to make. I'll definitely keep you in the loop along the way :-p Thanks for stopping by!
Proudly designed by | mlekoshiPlayground |