A Great Tip for Cricut Users that Love Using Their Cricut Markers

Monday, April 23, 2012

Hi everyone! I hope you all had a great weekend. The Cricut markers have been in stores for some time now and lately I’ve been thinking about how I can incorporate them into my every-day crafting. Then one day while I was sitting at my craft table it hit me! I could use them with the Hello Kitty Cartridge—since they have the silhouette feature, and let me tell you it works great!

The markers are very easy to use, all you’d need to do is read the simple instructions and you’re ready to go. Here is a quick video I made showing how it works.
Then once the image has been drawn onto your card stock, you can either use the ‘blackout’ feature to cute the Hello Kitty silhouette or you can cut it out yourself like I did.
I’m going to be trying this with a few other characters on this cartridge and I’ll be sure to share my new ideas! I can’t wait!

New Fabric and a Sewing Announcement

Tuesday, April 17, 2012

Hi everyone! I hope you’re all having a happy and productive Tuesday! I just wanted to share this beautiful image of the new fabrics I’m using to make some really cute coin purses and new camera cases. Recently I took my usual trip downtown in search of new colorful tribal prints and overall bright fabrics, and I think I was successful this time around. The fabric store that I frequent was loaded with new prints and I couldn’t be more excited to eventually work with them all. While I was browsing through the sea of beautiful fabrics I decided that I would put all my paper crafting tools away for a few months so I can get back into my first crafty love—which is making purses. When I started my new shop (Unify), I wanted to have a mixture of everything I make; such as, purses, cases, zipper pouches, tags, cards, toppers and everything else. But I found myself mainly working with my paper crafts because I couldn’t get enough of them! However, now I’m feeling the sewing itch. Many nights that I’m about to go to sleep I think of new ideas for my shop, and those thoughts and ideas are starting to consist only of fabric and new purses designs. Therefore, get ready for my purse comeback! I can’t wait to share all my new and old designs with everyone.  

So Excited About the New Cricut Cartridge

Thursday, April 12, 2012

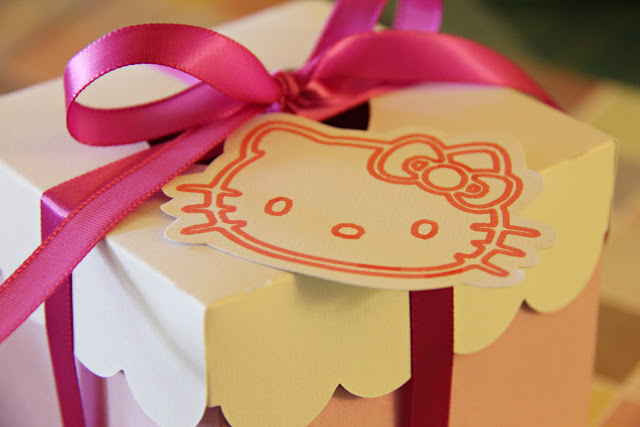
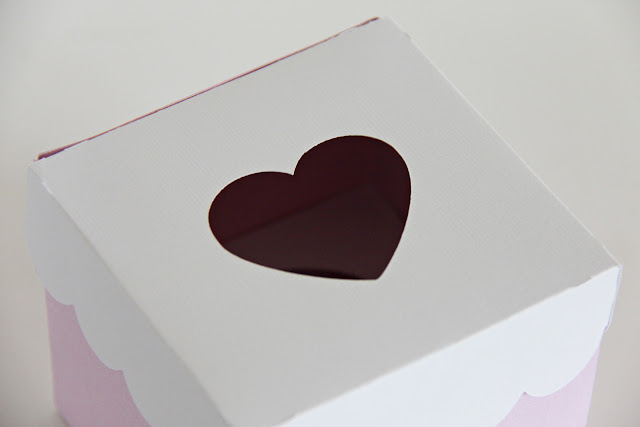
I stumbled upon the new Cricut Cartridge at my local craft shop (or at least I think it’s new—I’ve never seen it in stores before so it’s new to me, haha), and I almost had a heart attack. It’s the ‘Sweet Tooth Boxes’ cartridge; and you can make a variety of treat boxes and tags! If you don’t know by now I love to make cupcakes and use them for my photo shoots—but now I have something cute to give them away in. Right now one of the projects I’m obsessing over the single cupcake box with the heart window on top. I just melt every time I look at it because it is SO cute. Ok enough talking, let me just show you a few pictures of the pieces of the treat box and how it looks assembled.


Isn’t it so cute?! What’s great about this new cartridge is the instructions book—it’s much more detailed than the older Cricut cartridges and it even shows you how to glue the box together. In other cartridges it doesn’t even show you how to put favor boxes together—they just kind of let you figure it out on your own. Another cool feature in the instruction booklet is they even tell you exactly what size to print everything out in so you don’t have to waste paper trying to figure that out too. So, I’m super happy about that.
Not only am I excited about being able to give these to my friends and family after I’ve made a big batch of cupcakes that I won’t each, but I’m also excited to offer these cute boxes in my shop.

Giveaway—the First of Many

Monday, April 9, 2012

I’m happy to announce my first blog giveaway! In honor of hitting the 100 sales mark in my Etsy shop I’ll be giving one lucky winner this NEW unused Martha Stewart clear stamp set and an acrylic block. I know they seem like a prize that should be given away during Valentine’s season—but really, these can be used for more than just Valentine’s Day. I also love to use these stamps year round for events; such as, Weddings, and Anniversaries. For ideas on how you can use this stamps take a look at some of the things I’ve made using them:


·         This giveaway is for unifyhandmade.blogspot.com readers only.
·         Unifyhandmade readers can leave a comment to enter—with contact information in case you win.
For additional entrees (You may leave a separate comment for each additional action)
·         Like my facebook page.
·         Follow me on Twitter @unifyhandmade
·         Share this giveaway on your Facebook page.
Good Luck! I can’t wait to find out who the lucky winner is! The winner of this contest will be announced April 23, 2012.


Affordable Last Minute Easter Cake

Saturday, April 7, 2012

     If you’re like me you don’t think of what you’re going to make for Holiday parties until the last minute, and this year I thought about making a cute—cheap, Easter themed Cake. If you have eggs and food coloring at home in your pantry already then this cake will only cost you a little over $5.00. To make this cake all you’ll need is:
·         2 boxes of white cake mix ($1.00 each)
·         2 containers or white icing  ($1.59 each)
·         2 or 1 small round baking pans
·         Food coloring
·         Vegetable oil
·         6 eggs
·         Water
What I did for the first batch was simply follow the instructions on the back of the cake mix box—once that was done, I divided the batter in half—in separate bowls, then added yellow food coloring into one bowl and pink food coloring into another. Then bake! Once they are out, wash and dry all the dishes and pans, then repeat—but with the purple and blue food coloring instead of the pink and yellow. Once they have cooled on a rack you can start icing. What I do is place the first cake layer facing up and then trim the top off to insure the cake will be level (I do this for each cake layer). After you have trimmed the first layer, simply spread about 2 tbsp of the icing on top then repeat those steps for the other layers. It should look something like this: (sorry for the poor image quality I did this last night and I didn’t have much natural lighting, lol).
Then from this point you can simply use the remaining frosting to finish it up. Then you are ready to serve or take it your party!


I hope you all have enjoyed this post—and I hope you have a GREAT Easter!
Also, stay tuned for……

Cute Things You Can Make Without a Cricut—Using Affordable Tools

Wednesday, April 4, 2012

    Every once in a while I’ll have friends over for a visit, and they (and their children) are always immediately drawn to my craft table. I’m always willing to answer any questions they may have about what certain things are, how they work, and how much certain tools cost. But one of the most common statements I get from visitors is, “I wish I could make these cards, or these cupcakes toppers, but I don’t have a Cricut.” Every single time I heart that I’m not convinced, lol. I always say, “You don’t NEED a Cricut to do most of the things I make.” Sure the Cricut can make tons of things—but to be honest most of the time I only use my Cricut for printing out tags, and making Hello Kitty items. I love being hands on with every step of my craft—the items I create with tools and my hands always seem to come out better and I feel that they have more value.
What are those tools you ask? They’re craft punches! –Craft punches, high quality card stock, stamps, ink, glue, ribbon, imagination, love, etc. Here are some of the craft punches I use to create cupcake toppers, tags, cards, and embellishments.
Once I’ve punched out the shape I want, I just use some stamps to decorate the paper and these are some of the items I’ve made using these tools (without a Cricut).


Therefore, you can create some of these too. Perhaps with every paycheck you can buy a craft punch, some paper (when it’s on sale), and other needed tools—to start creating and sharing these things with the world.
Proudly designed by | mlekoshiPlayground |