
Lately I’ve been having some trouble getting traffic on my new website, and I decided to revert to a traditional way of spreading the word about my website—flyers! I’m not a professional when it comes to making flyers; therefore, I used the only tools I had on my computer to create a clean, simple, and organized flyer using Microsoft Paint & Photoshop. Now, I’m sure I could have done the entire flyer on Paint, but I used Photoshop to arrange all my text and images because their features are a bit more convenient.
If you take a look at the flyer I’ve created you’ll notice I used my Etsy images—titles, prices, and all. Some of you may be wondering how I did that, and others might already know exactly what I did. Well, I took full advantage of my ‘Print Screen’ key (located on my keyboard), and became best friends with it. Here’s how I did it:
Go to your Etsy page, and use your ‘Featured Items’. They are all in a perfectly aligned row, and they would make for a great banner! To do this: press your ‘Print Screen’ or Prt Scr’ key. Next click your ‘Start’ button—located on the bottom left hand side of your screen. Then click, ‘All Programs’, then click ‘Accessories’ and lastly go ahead and click on your ‘Paint’ program.

Once the program is ready to go, click on ‘edit’, and then click ‘Paste’. You should see a print screen of your entire screen.
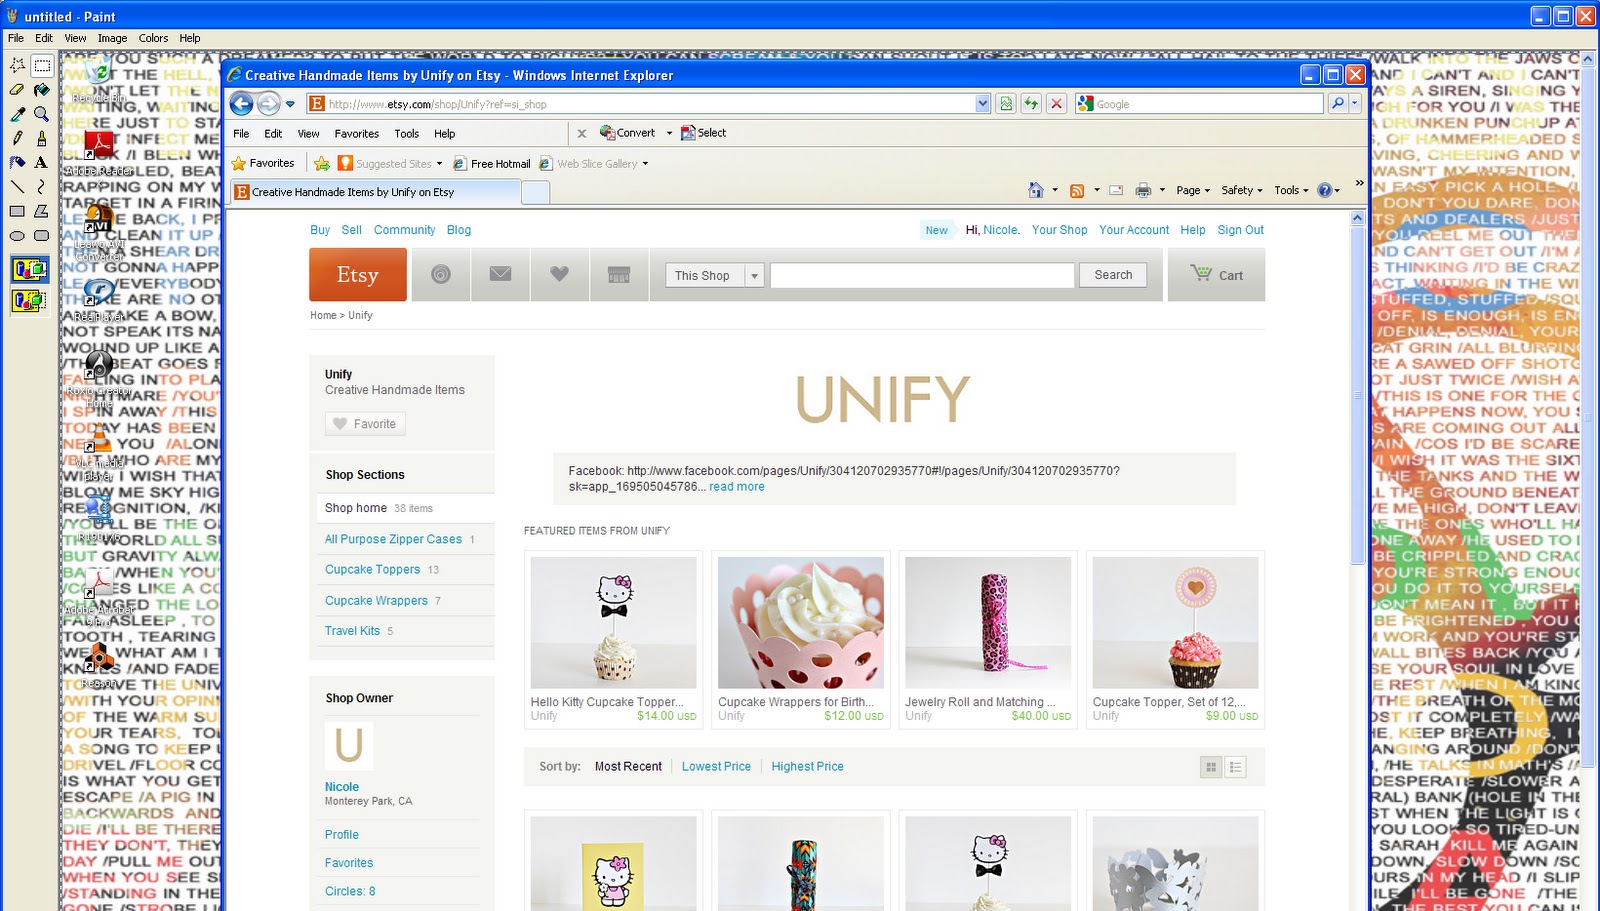
Now all you need to do is crop the image you would like to use. To do this: simply click on the crop feature.

Then crop the image you would like to use.

Once you have cropped the desired image right click on that cropped image—then click ‘cut’. Next, you’ll want to is get cropped image by itself; and what I do is click ‘File’, then ‘New’ (when it asks’ if I want to save I click ‘no’). Next, click ‘edit’ once again, and then click ‘Paste’. At this point only the image you’ve selected and cropped should appear. Then you can save and repeat for all the other images. Lastly, when all the images you need for your flyer have been saved you can use Photoshop to arrange all your images and text. Also remember to start with a new file that is the same exact size as standard printing paper (8 ½” x 11”).
What I also like to do is keep my Facebook fans up to date on what is going on with my website, and any time one of the items in my website is treasured I’ll share that treasury image with them on my page. The ‘prt Scr’ button works so well for sharing treasuries on websites:

I hope that this brief tutorial has inspired you to create your own flyers. I would advise taking some time out of your busy day to familiarize yourself with these basic programs. When running your own business it’s an added bonus to be able to do these types of things for yourself—in order to save some money.
